Table of Contents
Your month-by-month guide to optimal conditions for summit adventures
Weather & Road Conditions
- [ ] Check the Mauna Kea Summit Weather Center for current conditions
- [ ] Verify summit road status (open/closed)
- [ ] Review 3-day weather forecast
- [ ] Check sunrise/sunset times for timing
- [ ] Monitor wind speed predictions (>40mph = dangerous)
Vehicle Preparation
- [ ] Confirm 4WD rental allows Mauna Kea Summit access
- [ ] Fill fuel tank completely (engines work harder at altitude)
- [ ] Check tire pressure and tread depth
- [ ] Verify spare tire and jack are present
- [ ] Test 4WD system functionality
- [ ] Check fluid levels (oil, coolant, brake fluid)
Physical Preparation
- [ ] Begin hydrating 24 hours in advance
- [ ] Avoid alcohol consumption
- [ ] Get quality sleep (8+ hours)
- [ ] Eat light, nutritious meals
- [ ] Take altitude sickness self-assessment quiz
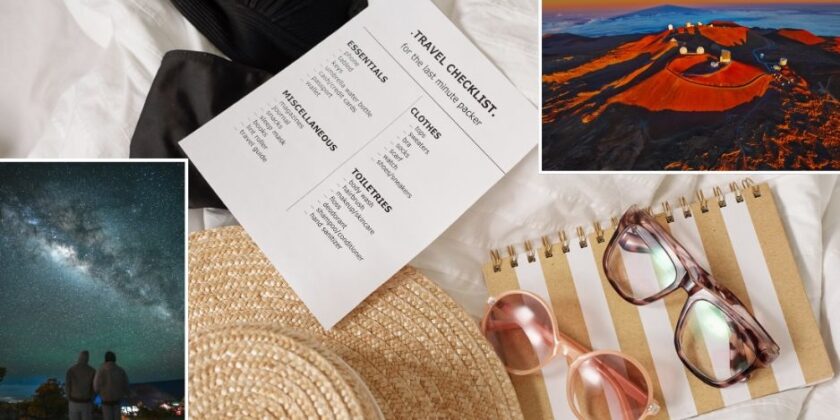
Essential Gear Checklist
Clothing System (Layered Approach)
- [ ] Moisture-wicking base layer (synthetic or merino wool)
- [ ] Insulating mid-layer (fleece or down jacket)
- [ ] Windproof/waterproof outer shell
- [ ] Warm hat that covers ears
- [ ] Insulated gloves or mittens
- [ ] Neck gaiter or scarf
- [ ] Warm wool or synthetic socks
- [ ] Sturdy closed-toe shoes with good grip
- [ ] Extra layer in case temperature drops further
Sun Protection (Critical at Altitude)
- [ ] High SPF sunscreen (30+ minimum)
- [ ] UV-blocking sunglasses
- [ ] Lip balm with SPF protection
- [ ] Wide-brimmed hat for daytime visits
Hydration & Nutrition
- [ ] 2-3 liters of water per person minimum
- [ ] Electrolyte supplements or sports drinks
- [ ] High-energy snacks (nuts, energy bars, dried fruit)
- [ ] Light lunch if planning extended stay
- [ ] Thermos with hot beverage for warmth
Safety & Emergency Equipment
- [ ] First aid kit with altitude sickness medications
- [ ] Flashlight or headlamp with extra batteries
- [ ] Emergency blanket (space blanket)
- [ ] Fully charged cell phone (limited service, but essential)
- [ ] Portable phone charger/power bank
- [ ] Emergency whistle
- [ ] Multi-tool or basic tool kit
Photography & Documentation
- [ ] Camera with extra batteries (cold drains batteries fast)
- [ ] Lens cleaning cloths (dust and condensation)
- [ ] Tripod for astrophotography
- [ ] Red flashlight for night photography
- [ ] Memory cards and storage
Day of Mauna Kea Summit Adventure Checklist
Pre-Departure (2-3 hours before)
- [ ] Final weather check
- [ ] Inform someone of your travel plans and expected return
- [ ] Pack all gear systematically
- [ ] Dress in base layers before leaving
- [ ] Eat light breakfast
- [ ] Use bathroom facilities
Departure Strategy
- [ ] For Sunrise: Leave 3 hours before sunrise time
- [ ] For Sunset: Arrive summit by 3 PM latest
- [ ] For Stargazing: Plan descent before 8 PM
- [ ] Allow extra time for first-time summit drivers
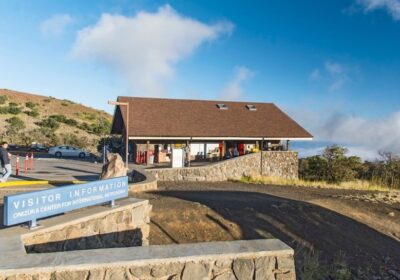
At Visitor Information Station (Mandatory Stop)
- [ ] Use restroom facilities (last before summit)
- [ ] Fill water bottles if needed
- [ ] Spend minimum 30-45 minutes acclimatizing
- [ ] Check for any ranger programs or updates
- [ ] Assess how you feel at 9,200 feet
- [ ] Add additional layers before continuing
Summit Readiness Check
- [ ] Confirm 4WD is engaged
- [ ] Check that everyone feels well (no altitude sickness symptoms)
- [ ] Verify you have 3+ hours before sunset
- [ ] Ensure fuel level is adequate for return trip
- [ ] Review emergency plan with all travelers
Altitude Sickness Prevention & Recognition
Prevention Strategies
- [ ] Ascend gradually (mandatory VIS stop)
- [ ] Stay well-hydrated
- [ ] Avoid alcohol and sedatives
- [ ] Eat light, carbohydrate-rich foods
- [ ] Consider preventive medication if prone to altitude sickness
Early Warning Signs (Turn Back If Experiencing)
- [ ] Headache that worsens with time
- [ ] Nausea or vomiting
- [ ] Unusual fatigue or weakness
- [ ] Dizziness or lightheadedness
- [ ] Loss of appetite
- [ ] Difficulty sleeping or concentrating
Serious Symptoms (Descend Immediately)
- [ ] Severe headache not relieved by rest/fluids
- [ ] Vomiting that prevents fluid intake
- [ ] Confusion or altered mental state
- [ ] Difficulty walking or balance problems
- [ ] Rapid pulse or breathing at rest
Cultural Respect Guidelines at The Mauna Kea Summit

Sacred Site Protocols
- [ ] Research Hawaiian and Mauna Kea cultural significance beforehand
- [ ] Speak quietly and respectfully
- [ ] Stay on designated paths and roads
- [ ] Respect all barriers and “kapu” (forbidden) signs
- [ ] Don’t remove rocks, plants, or other natural items
- [ ] Pack out all trash (Leave No Trace principles)
Observatory Etiquette
- [ ] Don’t block access roads or emergency routes
- [ ] Avoid using bright lights near telescopes
- [ ] Don’t climb on or touch scientific equipment
- [ ] Respect security perimeters and restricted areas
- [ ] Keep noise levels minimal
Vehicle & Driving Preparation for The Mauna Kea Summit
4WD Driving Essentials
- [ ] Practice 4WD operation before summit attempt
- [ ] Understand low-range gearing for steep descents
- [ ] Know how to handle loose gravel/cinder surfaces
- [ ] Plan for extended brake usage on descent
- [ ] Carry jumper cables and basic tools
Emergency Vehicle Kit
- [ ] Spare tire (properly inflated)
- [ ] Jack and lug wrench
- [ ] Jumper cables or portable jump starter
- [ ] Basic tool kit
- [ ] Emergency triangles or flares
- [ ] Tow strap (if available)
- [ ] Engine coolant and oil
- [ ] Tire pressure gauge
Photography Preparation
Daytime Photography
- [ ] Polarizing filter to cut glare and enhance contrast
- [ ] ND filters for bright conditions
- [ ] Wide-angle lens for landscape shots
- [ ] Telephoto lens for distant observatory shots
Astrophotography Setup
- [ ] Sturdy tripod (essential for long exposures)
- [ ] Remote shutter release or intervalometer
- [ ] Extra camera batteries (cold weather drains quickly)
- [ ] Red flashlight to preserve night vision
- [ ] Star chart or astronomy app
- [ ] Warm gloves that allow camera operation
Safe Return from The Mauna Kea Summit
Descent Planning
- [ ] Begin descent minimum 1 hour before sunset
- [ ] Use engine braking (low gear) to spare brakes
- [ ] Stop periodically to let brakes cool
- [ ] Check vehicle fluids if overheating occurred
- [ ] Drive slower than ascent due to fatigue effects
Post-Adventure Safety
- [ ] Rest at VIS if feeling tired or unwell
- [ ] Rehydrate thoroughly
- [ ] Check in with emergency contact person
- [ ] Review photos and experiences while fresh
- [ ] Plan recovery time for altitude adjustment
Emergency Contacts & Resources
Critical Phone Numbers
- Emergency Services: 911
- Mauna Kea Ranger Station: (808) 961-2180
- Big Island Police: (808) 935-3311
- Your Rental Car Company: ________________
- Your Emergency Contact: ________________
Useful Websites
- Mauna Kea Weather Center: mkwc.ifa.hawaii.edu
- Office of Mauna Kea Management: malamamaunakea.org
- Current Road Conditions: hawaiicounty.gov
- Astronomy Programs: ifa.hawaii.edu/info/vis
Quick Reference: What NOT to Do on Mauna Kea Summit
Dangerous Behaviors to Avoid
- [ ] ❌ Drive summit road after dark
- [ ] ❌ Attempt summit with standard 2WD vehicle
- [ ] ❌ Rush the ascent without acclimatization
- [ ] ❌ Ignore altitude sickness symptoms
- [ ] ❌ Park blocking telescope or emergency access
- [ ] ❌ Remove natural or cultural artifacts
- [ ] ❌ Attempt summit during high wind warnings
- [ ] ❌ Go alone without informing others of plans
Success Metrics
You’ll Know You’re Prepared When:
- [ ] You can explain the altitude challenges to a friend
- [ ] Your gear is organized and easily accessible
- [ ] You have realistic time expectations
- [ ] You understand cultural protocols
- [ ] You have multiple backup plans for weather issues
- [ ] You feel excited but respectful about the journey ahead
Post-Adventure Reflection
- [ ] Did you feel prepared and safe throughout?
- [ ] What would you do differently next time?
- [ ] What was the most surprising aspect of the experience?
- [ ] How did the reality compare to your expectations?
- [ ] Would you recommend this experience to others?
Remember: Mauna Kea demands respect, rewards preparation, and transforms those who approach it with the right spirit. This checklist ensures you’re ready for one of Hawaii’s most extraordinary adventures.
Print this checklist and check off items as you prepare. Your safety and success depend on thorough preparation!
Mauna Kea Weather Guide: When to Visit Hawaii's Sacred Summit

Your month-by-month guide to optimal conditions for summit adventures
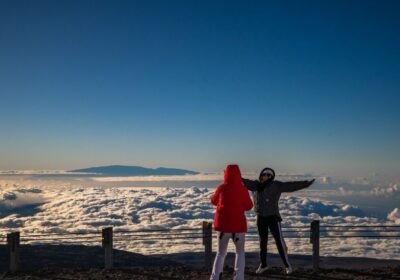
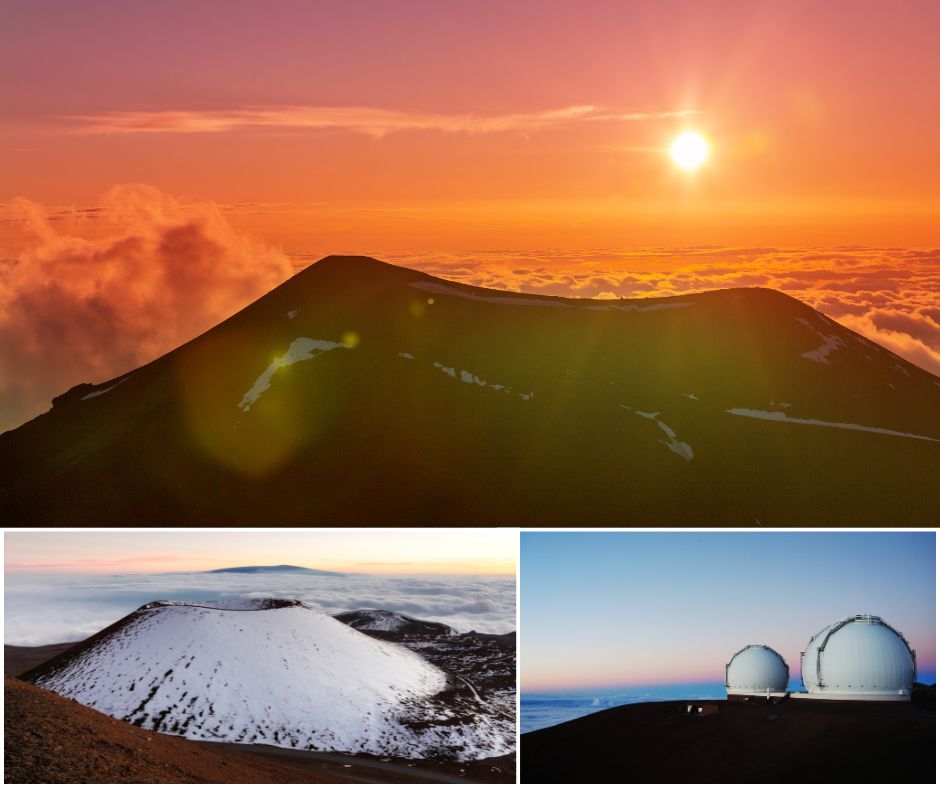
Understanding Mauna Kea’s Unique Climate
Mauna Kea Mountain creates its own weather system, often completely different from conditions at sea level. While Kona basks in 85°F sunshine, the summit might be experiencing snow, high winds, or near-freezing temperatures. Understanding these patterns helps you plan the perfect visit.
Key Climate Facts:
- Temperature drop: 3-4°F per 1,000 feet of elevation
- Summit elevation: 13,803 feet (40°F+ colder than sea level)
- Weather independence: Summit conditions often opposite of coastal weather
- Rapid changes: Conditions can shift from clear to dangerous in 30 minutes
Spring: March – May
The Sweet Spot Season
Why Spring is Ideal for Mauna Kea Tours
Spring offers the most predictable weather patterns and comfortable conditions for both beginners and experienced mountain visitors. The winter storm season has passed, but summer’s intense afternoon thunderstorms haven’t yet begun.
March Weather Patterns
- Mauna Kea’s Summit Temperature Range: 25°F to 45°F
- Precipitation: Low (transitioning from winter rains)
- Wind Conditions: Moderate (15-25 mph average)
- Snow Probability: 20% (late winter storms possible)
- Road Closure Risk: Low-moderate
- Best Activity: Sunrise photography, astronomy tours
March Pro Tips:
- Snow can still occur, especially early March
- Excellent astronomical viewing due to clear, stable air
- Crowds are minimal (spring break focuses on beaches)
- Perfect time for first-time summit visitors
April Weather Patterns
- Mauna Kea Summit Temperature Range: 30°F to 50°F
- Precipitation: Very low
- Wind Conditions: Light to moderate (10-20 mph)
- Snow Probability: 5%
- Road Closure Risk: Very low
- Best Activity: All activities (ideal month)
April Advantages:
- Most reliable weather of the year
- Comfortable temperatures for extended summit stays
- Excellent visibility for photography
- Perfect conditions for hiking the Humuʻula Trail
May Weather Patterns
- Mauna Kea Summit’s Temperature Range: 35°F to 55°F
- Precipitation: Low
- Wind Conditions: Variable (can increase toward month-end)
- Snow Probability: Less than 5%
- Road Closure Risk: Low
- Best Activity: All summit activities, family visits
May Considerations:
- Trade wind patterns begin strengthening
- Afternoon clouds start becoming more common
- Still excellent for all skill levels
- Last month before summer intensity
Summer: June – August
Adventure Season with Afternoon Challenges
Summer Weather Reality
Summer brings warm temperatures and generally dry conditions, but also introduces the challenge of afternoon and evening thunderstorms. Early morning visits become essential for reliable weather windows.
June Weather Patterns
- Maunakea Summit Temperature Range: 40°F to 60°F
- Precipitation: Moderate (afternoon/evening showers)
- Wind Conditions: Variable (5-30 mph)
- Snow Probability: 0%
- Road Closure Risk: Low (weather-related), Moderate (ice rare but possible)
- Best Activity: Early morning visits, sunrise viewing
June Strategy:
- Plan all summit activities before 2 PM
- Afternoon thunderstorms develop regularly
- Excellent early morning conditions
- Warmest summit temperatures of the year
July Weather Patterns
- Kea Mauna Summit Temperature Range: 45°F to 65°F
- Precipitation: Moderate to high (afternoon storms common)
- Wind Conditions: Highly variable (calm to 40+ mph)
- Snow Probability: 0%
- Road Closure Risk: Moderate (afternoon storms)
- Best Activity: Sunrise visits, early astronomy programs
July Challenges:
- Most unpredictable month for afternoon weather
- Summit can be pleasant at sunrise, dangerous by 3 PM
- Requires flexible scheduling
- High visitor volume increases crowding
August Weather Patterns
- Summit Temperature Range: 45°F to 65°F
- Precipitation: High (daily afternoon storms likely)
- Wind Conditions: Highly variable and potentially dangerous
- Snow Probability: 0%
- Road Closure Risk: High (afternoon/evening storms)
- Best Activity: Early morning only
August Warnings:
- Afternoon thunderstorms are nearly guaranteed
- Lightning danger at exposed summit
- High winds can develop suddenly
- Most weather-related closures occur in afternoon/evening
Fall: September – November
Transition Season with Great Opportunities
Fall Weather Benefits
Fall offers a return to more stable weather patterns as summer’s storm season subsides. September can still have summer-like afternoon challenges, but October and November provide excellent conditions for all activities.
September Weather Patterns
- Summit Temperature Range: 40°F to 60°F
- Precipitation: Moderate (decreasing through month)
- Wind Conditions: Variable (improving toward month-end)
- Snow Probability: 0%
- Road Closure Risk: Moderate early, low late in month
- Best Activity: Late September excellent for all activities
September Transition:
- Early September: still summer-like afternoon storms
- Late September: much more stable conditions
- Excellent month for experienced visitors who can read weather
October Weather Patterns
- Summit Temperature Range: 35°F to 55°F
- Precipitation: Low
- Wind Conditions: Generally moderate (15-25 mph)
- Snow Probability: 0%
- Road Closure Risk: Low
- Best Activity: All activities (second-best month after April)
October Advantages:
- Very stable weather patterns
- Excellent astronomical viewing (clear, dry air)
- Comfortable temperatures for extended visits
- Lower tourist numbers than summer
November Weather Patterns
- Summit Temperature Range: 30°F to 50°F
- Precipitation: Low to moderate (winter pattern beginning)
- Wind Conditions: Increasing (winter weather approaching)
- Snow Probability: 10% (late month)
- Road Closure Risk: Low to moderate
- Best Activity: All activities, but prepare for winter gear needs
November Considerations:
- Early winter storms can surprise visitors
- Excellent for experienced mountain visitors
- Weather becomes less predictable toward month-end
- Still generally good conditions
Winter: December – February
Extreme Conditions and Unique Experiences
Winter Weather Reality
Winter brings Mauna Kea’s most challenging conditions—snow, ice, high winds, and freezing temperatures. However, it also offers the most dramatic and unique experiences, including snow on a tropical island.
December Weather Patterns
- Summit Temperature Range: 20°F to 40°F
- Precipitation: High (winter storm season begins)
- Wind Conditions: High (often 30+ mph)
- Snow Probability: 40%
- Road Closure Risk: High
- Best Activity: Weather-dependent; excellent when conditions allow
December Challenges:
- First major winter storms arrive
- Snow and ice create dangerous road conditions
- High wind events common
- Requires advanced preparation and flexibility
January Weather Patterns
- Summit Temperature Range: 15°F to 35°F
- Precipitation: High (peak winter storm season)
- Wind Conditions: Often extreme (40+ mph common)
- Snow Probability: 60%
- Road Closure Risk: Very high
- Best Activity: Only for experienced winter mountaineers
January Realities:
- Most challenging month for summit access
- Snow can persist for days or weeks
- Ice makes roads extremely dangerous
- Many commercial tours suspend operations
February Weather Patterns
- Summit Temperature Range: 20°F to 40°F
- Precipitation: High (continuing winter pattern)
- Wind Conditions: High (but beginning to moderate)
- Snow Probability: 50%
- Road Closure Risk: High
- Best Activity: Weather windows can provide spectacular experiences
February Opportunities:
- Late February often has weather breaks
- Snow-covered summit creates unique photo opportunities
- Excellent for very experienced winter visitors
- Fewer crowds due to challenging conditions
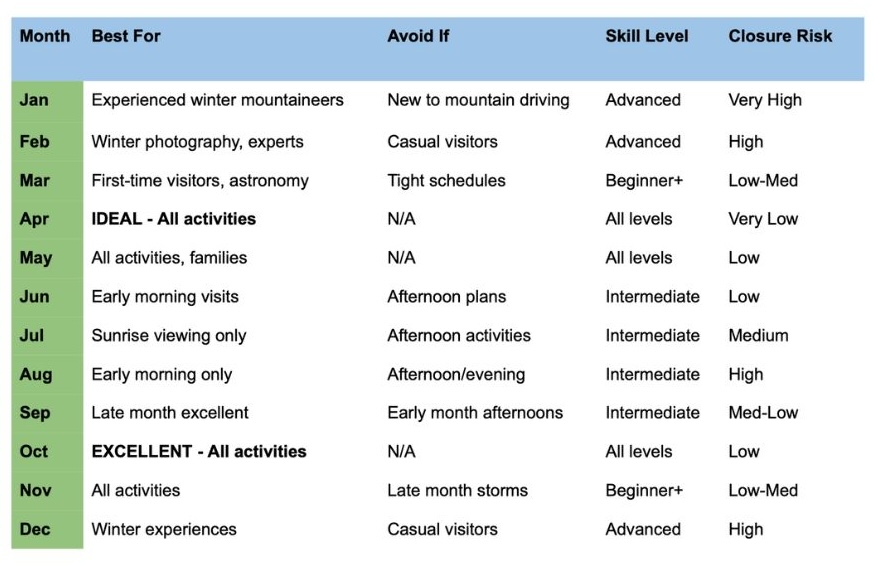
Monthly Quick Reference Chart
Special Weather Phenomena
Temperature Inversions
Common in winter and spring, where the summit is actually warmer than mid-elevations due to atmospheric layering. Can create spectacular cloud formations.
Snow Events
- Light dustings: Common Dec-Feb, usually melt quickly
- Significant snow: 1-3 times per winter, can close roads for days
- Blizzard conditions: Rare but dangerous, complete whiteout possible
High Wind Events
- Sustained winds 40+ mph: Dangerous for driving and hiking
- Gusts over 60 mph: Can overturn vehicles
- Kona winds: Hot, dry winds that create extreme fire danger
Rapid Weather Changes
- Clear to storm: Can happen in 15-30 minutes
- Calm to dangerous winds: Weather monitoring essential
- Warm to freezing: Temperature drops of 30°F+ possible
Planning Your Visit by Weather Goals
For Astronomical Viewing:
- Best months: March, April, October, November
- Optimal conditions: Clear, dry, low wind nights
- Moon phase considerations: New moon periods ideal
For Photography:
- Landscape photography: April, May, October
- Snow photography: January, February (weather permitting)
- Sunrise/sunset: March through November most reliable
For Hiking:
- Humuʻula Trail: April, May, September, October
- Avoid hiking: December through February (dangerous conditions)
For Family Visits:
- Most suitable: April, May, October
- Good backup plans needed: All other months
Weather Resources and Tools
Essential Weather Websites:
- Mauna Kea Weather Center: mkwc.ifa.hawaii.edu
- National Weather Service: weather.gov/hfo
- Mauna Kea Webcams: Live summit conditions
Mobile Apps:
- Weather Underground: Detailed local forecasts
- Windy.com: Wind speed and direction predictions
- Mountain-forecast.com: Specialized mountain weather
Local Knowledge:
- VIS Staff: Current conditions and local expertise
- Astronomy Tour Guides: Real-time weather assessment
Online Forums: Recent visitor reports and conditions
Emergency Weather Protocols
If Caught in Sudden Weather:
- Descend immediately – don’t wait for conditions to improve
- Use low gears – engine braking essential in slippery conditions
- Turn on headlights – visibility can drop to zero quickly
- Stay calm – panic leads to dangerous decisions
- Call for help if vehicle becomes disabled (limited cell service)
Weather-Related Cancellation Triggers:
- Sustained winds over 40 mph
- Visibility under 50 feet
- Active thunderstorms in area
- Ice or snow on road surface
- Temperature below 20°F with wind
Remember: Mauna Kea weather can be deceiving. Always check current conditions, have backup plans, and prioritize safety over summit goals. The mountain will be there tomorrow—make sure you are too.
Complete Cost Guide: Budgeting Your Mauna Kea Summit Adventure
Everything you need to know about the real costs of exploring Hawaii’s sacred mountain
The Great Mauna Kea Myth: “It’s Free!”
While it’s true that Mauna Kea Mountain has no entrance fee, calling it “free” is like saying climbing Mount Everest is free because there’s no park admission. The real costs lie in preparation, transportation, and gear—and these can vary dramatically based on your chosen approach.
After guiding hundreds of visitors with budgets ranging from backpacker-minimal to luxury-unlimited, I’ve learned that the most satisfied adventurers are those who budget realistically and understand where their money goes.
Cost Overview: Three Approach Levels
Budget Adventure: $75-150 per person
Visitor Center focus with basic summit attempt
Standard Experience: $200-400 per person
Professional tour or well-equipped independent summit
Premium Adventure: $500-800+ per person
Luxury tours, specialized gear, extended experiences
Independent Budget Adventure ($75-150)
Vehicle Costs
- Standard rental car to VIS: $30-50/day
- Gas (round-trip from Kona): $15-25
- Parking: FREE
- Total Vehicle: $45-75
Essential Gear (if purchasing)
- Warm jacket: $25-60 (thrift stores/discount retailers)
- Gloves and hat: $10-20
- Water bottles: $5-15
- Snacks: $10-20
- Total Gear: $50-115
What You Get:
- Full Visitor Information Station experience
- Spectacular views and sunset/sunrise opportunities
- Free stargazing programs (when available)
- Cultural and educational displays
- Acclimatization for future summit attempts
Budget Strategy Tips:
- Borrow or rent gear instead of purchasing
- Shop at local discount stores like Walmart or Ross
- Visit during stable weather months to avoid gear upgrades
- Focus on VIS experience rather than summit pressure
Real Example: Sarah and Mike, college students from Oregon, spent $89 total for their Mauna Kea experience. They borrowed winter gear from friends, drove their rental economy car to the VIS, packed homemade sandwiches, and spent an entire afternoon and evening exploring. “We got 80% of the experience for 20% of the cost,” Sarah noted.
Independent Summit Adventure ($185-$315)
Vehicle Costs
- 4WD Jeep rental (approved for summit): $150-$250/day
- Insurance upgrade: $15-30/day
- Gas (higher consumption at altitude): $20-35
- Total Vehicle: $185-$315
Essential Gear Investment
- Quality winter jacket: $60-150
- Insulated gloves: $15-40
- Warm layers: $30-80
- Proper footwear: $40-120
- Emergency supplies: $25-50
- Total Gear: $170-440
Food and Hydration
- High-quality snacks: $15-30
- Electrolyte supplements: $10-20
- Thermal drinks: $10-15
- Total Food: $35-65
What You Get:
- Complete summit access and experience
- Personal achievement and bragging rights
- Unlimited time at summit (weather permitting)
- Photography opportunities without group constraints
- Deep personal connection to the mountain
Money-Saving Strategies:
- Rent gear instead of buying when possible
- Split costs with travel companions
- Choose mid-week rentals for better rates
- Book accommodations near departure point to reduce drive time
Real Example: David and Jennifer (before their rental car disaster!) budgeted $280 for their independent summit adventure. After learning from their mistakes, they returned properly prepared with Harper Car Rentals ($120), borrowed winter gear, and had an incredible experience for $195 total.
Guided Tour Experience ($200-400)
Tour Options and Pricing
- Budget group tours: $180-250 per person
- Small group astronomy tours: $220-300 per person
- Private group tours: $300-400 per person
- Luxury/photography tours: $350-500+ per person
What’s Typically Included:
- Professional 4WD transportation
- Expert guide services
- Warm clothing (parkas, gloves)
- Telescopes and astronomy equipment
- Hot beverages and snacks
- Cultural and scientific education
- Safety equipment and emergency preparedness
Additional Costs to Consider:
- Gratuities: $15-25 per person (recommended)
- Personal gear: $20-50 (items tours don’t provide)
- Pre-tour meals: $15-40
- Photography equipment: $0-200+ (if not provided)
- Transportation to tour meeting point: $10-50
Tour Value Analysis:
When you break down what tours provide:
- Vehicle rental equivalent: $100-150
- Professional guide: $50-100
- Equipment rental: $30-75
- Knowledge and safety: Priceless
Tours often provide better value than independent travel when you factor in expertise, safety, and equipment.
Choosing the Right Tour:
- Large groups (15+ people): Lower cost, less personal attention
- Small groups (8-12 people): Better experience, moderate cost
- Private tours (1-6 people): Premium experience, highest cost
- Specialized tours (photography, astronomy): Highest expertise, premium pricing
Real Example: Eleanor, the 72-year-old astronomy enthusiast, chose a $275 small-group astronomy tour. “I learned more in four hours than I could have in months of independent research,” she said. “Plus, I felt completely safe and comfortable.”
Premium Adventure Experience ($500-800+)
Luxury Tour Options
- Multi-day astronomy packages: $400-600 per person per day
- Professional photography workshops: $500-800 per person
- Private luxury vehicles with chef: $600-1000+ per person
- Helicopter access to summit: $800-1200 per person
High-End Independent Setup
- Premium 4WD rental: $150-250/day
- Professional photography gear: $100-300/day rental
- Top-tier outdoor clothing: $200-500 purchase
- Luxury accommodation near mountain: $200-400/night
- Professional guide services: $200-400/day
What Premium Experiences Offer:
- Exclusive access to optimal locations
- Professional instruction in photography or astronomy
- Gourmet meals and premium refreshments
- Luxury transportation and equipment
- Extended time at summit with optimal conditions
- Expert knowledge from specialists in their fields
When Premium Makes Sense:
- Once-in-a-lifetime trip where budget isn’t primary concern
- Professional photography or astronomy interests
- Physical limitations requiring extra assistance
- Large group events or special celebrations
- Time constraints demanding guaranteed experiences
Real Example: Marcus, a professional photographer from Germany, invested $750 in a specialized astrophotography workshop. He learned techniques worth years of trial-and-error, captured images that became part of his professional portfolio, and called it “the best investment in my photography career.”
Hidden Costs and Budget Surprises
Unexpected Expenses That Catch Visitors:
- Weather gear upgrades: $50-150 (when conditions are worse than expected)
- Extended rental days: $100+ (weather delays)
- Emergency assistance: $200-500+ (vehicle recovery, medical help)
- Rush equipment purchases: $100-300 (last-minute gear needs)
- Accommodation changes: $150+ (weather delays requiring extra nights)
Common Budget Mistakes:
- Underestimating gear needs for Hawaiian mountain conditions
- Choosing cheapest rental without reading summit restrictions
- Ignoring weather contingencies in planning
- Not budgeting for tips on guided tours
Forgetting photography expenses (memory cards, batteries)
Cost-Saving Strategies by Category
Vehicle Savings:
- Book early: Rates increase closer to travel dates
- Mid-week rentals: Often 20-30% cheaper than weekends
- Local companies: Sometimes better rates than major chains
- Membership discounts: AAA, military, professional organizations
Gear Savings:
- Borrow from friends: Especially effective for one-time visitors
- Thrift stores: Excellent selection in Hawaii’s outdoor communities
- End-of-season sales: Buy gear during off-peak months
- Multi-use items: Choose gear useful for other activities
Tour Savings:
- Book directly: Avoid third-party booking fees
- Group discounts: Many companies offer rates for 4+ people
- Shoulder season: Lower rates during less popular months
- Package deals: Combine with other Big Island activities
Food and Drink Savings:
- Pack from accommodation: Use hotel breakfast or condo kitchen
- Local grocery stores: Safeway, Foodland for supplies
- Bulk purchases: Share costs with travel companions
Refillable containers:
Mauna Kea Summit Emergency Action Plan
Critical Safety Protocols for Summit Adventures
PRINT THIS GUIDE and keep it in your vehicle during Mauna Kea travel. Cell service is unreliable on the mountain, and having physical emergency information can save lives.
IMMEDIATE DANGER SITUATIONS - CALL 911
Life-Threatening Emergencies:
- Severe altitude sickness (confusion, difficulty walking, severe headache)
- Vehicle accidents with injuries
- Medical emergencies (heart attack, stroke, severe allergic reactions)
- Severe hypothermia (uncontrollable shivering, confusion, drowsiness)
- Lost or stranded persons after dark
Emergency Contact: 911 Note: Cell service is limited. Try calling from multiple locations if initial attempt fails.
ALTITUDE SICKNESS EMERGENCY PROTOCOL
Mild Altitude Sickness (Common)
Symptoms: Headache, nausea, fatigue, dizziness Action Plan:
- Stop ascending immediately
- Rest at current elevation for 30-60 minutes
- Hydrate with water (no alcohol or caffeine)
- Eat light carbohydrates if tolerated
- If symptoms don’t improve in 1 hour → DESCEND
Moderate Altitude Sickness (Serious)
Symptoms: Severe headache, vomiting, extreme fatigue, loss of coordination Action Plan:
- DESCEND IMMEDIATELY – do not delay
- Someone else drives if available
- Monitor breathing and consciousness
- Prepare to call 911 if symptoms worsen
- Get to VIS or lower elevation ASAP
Severe Altitude Sickness (LIFE THREATENING)
Symptoms: Confusion, difficulty walking, severe breathing problems, unconsciousness Action Plan:
- CALL 911 IMMEDIATELY
- Begin immediate descent while waiting for help
- Keep person warm and conscious if possible
- Be prepared for rescue evacuation
- Do not leave person alone
WEATHER EMERGENCY PROCEDURES
Sudden Fog/Whiteout Conditions
When visibility drops below 50 feet:
- STOP DRIVING immediately
- Turn on hazard lights
- Pull as far off road as safely possible
- Wait for conditions to improve (can take 30 minutes to 3 hours)
- Do not attempt to drive in zero visibility
- Use GPS to track location if available
High Wind Emergency
When winds exceed 40 mph or vehicle stability is affected:
- Descend immediately – do not wait for conditions to worsen
- Drive slowly with firm grip on steering wheel
- Avoid sudden movements or direction changes
- If winds become uncontrollable → STOP and wait
- Consider abandoning summit attempt
Snow/Ice Conditions
When road becomes slippery or snow accumulates:
- Engage 4WD low range for maximum traction
- Drive slowly – sudden movements cause sliding
- Increase following distance dramatically
- If sliding occurs → steer into the slide
- If road becomes impassable → TURN AROUND
Lightning Storm Protocol
When thunderstorms approach summit:
- Leave summit area immediately – highest point = highest risk
- Get in vehicle and avoid touching metal
- Do not shelter under isolated trees
- Wait out storm at lower elevation
- Lightning can strike 10 miles from visible storm
VEHICLE EMERGENCY PROCEDURES
Engine Overheating
Common at altitude due to thin air:
- Turn off air conditioning immediately
- Turn on heater full blast (helps cool engine)
- Pull over safely and turn off engine
- Wait 30+ minutes before checking coolant
- Add water/coolant if level is low
- If overheating continues → call for help
Vehicle Won’t Start
Cold weather and altitude stress batteries:
- Try starting again after 5-minute wait
- Check battery connections for corrosion
- Attempt jump start if jumper cables available
- Signal for help from other vehicles
- Use emergency whistle if no one around
Flat Tire
Loose cinder causes frequent tire damage:
- Find safe, level location to change tire
- Set parking brake and use wheel chocks if available
- Change tire quickly due to cold/altitude exposure
- Tighten lug nuts in star pattern
- Drive slowly to verify repair stability
Vehicle Stuck/High-Centered
Loose volcanic cinder can trap vehicles:
- Don’t spin tires – this makes situation worse
- Clear material from around tires
- Use floor mats or rocks for traction under tires
- Rock vehicle gently forward and backward
- Signal for help from other 4WD vehicles
- Use emergency whistle or signals
MEDICAL EMERGENCY PROTOCOLS
Hypothermia Recognition & Treatment
Stages and Actions:
Mild Hypothermia:
- Symptoms: Shivering, fatigue, poor judgment
- Action: Get to warm, dry environment immediately
- Provide warm (not hot) drinks
- Change out of wet clothes
Moderate Hypothermia:
- Symptoms: Violent shivering stops, muscle stiffness, poor coordination
- Action: Handle person gently, warm core body temperature
- CALL 911 – this is serious
- Do not give alcohol or hot drinks
Severe Hypothermia:
- Symptoms: Unconsciousness, irregular heartbeat, apparent death
- Action: CALL 911 IMMEDIATELY
- Check for signs of life carefully
- Begin gentle warming of core body
- Be prepared for CPR
Heart Attack at Altitude
High altitude increases heart attack risk: Symptoms: Chest pain, shortness of breath, nausea, sweating Action:
- CALL 911 immediately
- Give aspirin if person is conscious and not allergic
- Begin descent while waiting for help
- Monitor breathing and pulse
- Be prepared for CPR
Severe Dehydration
Altitude accelerates dehydration: Symptoms: Extreme thirst, dark urine, dizziness, confusion Action:
- Move to shade/shelter
- Give small sips of water frequently
- Cool person down if overheated
- If person can’t keep fluids down → medical emergency
- Descend to lower elevation
EMERGENCY CONTACT INFORMATION
Primary Emergency Numbers
- Emergency Services: 911
- Big Island Police: (808) 935-3311
- Fire Department: (808) 961-8251
- Mauna Kea Rangers: (808) 961-2180
Medical Facilities
- Hilo Medical Center: (808) 932-3000 1190 Waianuenue Ave, Hilo, HI 96720
- North Hawaii Community Hospital: (808) 885-4444 67-1125 Mamalahoa Hwy, Waimea, HI 96743
- Kona Community Hospital: (808) 322-9311 79-1019 Haukapila St, Kealakekua, HI 96750
Vehicle Assistance
- AAA Roadside: (800) 222-4357
- Harper Car Rentals: (808) 969-1478
- Big Island Towing: (808) 961-6691
Emergency Contacts (Fill In)
- Your Emergency Contact: ________________
- Hotel/Accommodation: ________________
- Rental Car Company: ________________
- Travel Insurance: ________________
NAVIGATION EMERGENCY
Lost/Disoriented Protocol
If you lose your way on the mountain:
- STOP immediately – don’t keep driving randomly
- Stay with your vehicle – easier to find than people
- Use GPS if available to determine location
- Signal for help – horn, lights, emergency whistle
- Conserve energy and warmth
- Stay hydrated but ration water
Communication Challenges
Limited cell service requires creativity:
- Try different locations – move 100-200 yards for signal
- Try different carriers – ask other visitors to call
- Use vehicle horn in emergency pattern (3 short, 3 long, 3 short)
- Use emergency whistle – carries farther than voice
- Create visible signals – bright clothing, mirrors, lights
TIME-BASED EMERGENCY PROTOCOLS
Sunset Emergency Protocol
If sunset approaches and you’re not safely down:
- Abandon summit plans immediately
- Begin descent with available daylight
- Turn on headlights even in partial daylight
- Drive slower than normal – night driving is dangerous
- If darkness catches you → STOP and wait for help
Weather Deterioration Timeline
When conditions worsen rapidly:
- First 15 minutes: Monitor situation, prepare for descent
- 30 minutes: Begin descent if conditions continue worsening
- 45 minutes: Mandatory descent regardless of summit goals
- 60+ minutes: Emergency protocols if trapped by weather
EMERGENCY SUPPLY CHECKLIST
Vehicle Emergency Kit (Always Carry)
- [ ] First aid kit with altitude sickness medications
- [ ] Emergency blankets (space blankets)
- [ ] Extra water (minimum 1 gallon)
- [ ] High-energy food (energy bars, nuts)
- [ ] Flashlight with extra batteries
- [ ] Emergency whistle
- [ ] Multi-tool or basic tools
- [ ] Jumper cables
- [ ] Reflective triangles or flares
- [ ] Duct tape (vehicle repairs)
Personal Emergency Items
- [ ] Warm emergency clothing layer
- [ ] Emergency shelter (bivy sack or tarp)
- [ ] Fire starting materials (waterproof matches)
- [ ] Signal mirror
- [ ] Emergency cash
- [ ] Copy of important documents
- [ ] Prescription medications
- [ ] Emergency contact information
RESCUE SIGNALING METHODS
Visual Signals
- Mirror/Reflective surface: Flash at aircraft or distant people
- Bright clothing: Lay out in open area to increase visibility
- Vehicle lights: Flash headlights in SOS pattern
- Fire/Smoke: If safe to build (be extremely careful)
Audio Signals
- Emergency whistle: 3 blasts, pause, repeat
- Vehicle horn: SOS pattern (3 short, 3 long, 3 short)
- Shouting: Save energy – only when help is nearby
Ground Signals
- Large X: Made from rocks or clothing = need medical help
- Large arrow: Point toward your location or direction of travel
SOS: Universal distress signal in rocks or snow
EMERGENCY ACTION CHECKLIST
Before Calling for Help – Gather This Information:
- [ ] Exact location (GPS coordinates if available)
- [ ] Nature of emergency
- [ ] Number of people involved
- [ ] Injuries or medical conditions
- [ ] Current weather conditions
- [ ] Vehicle information and accessibility
- [ ] Supplies available
- [ ] Your callback phone number
When Emergency Services Answer:
- State clearly: “Emergency on Mauna Kea Mountain”
- Give exact location: Mile marker, GPS coordinates, landmarks
- Describe emergency: Medical, vehicle, weather-related
- Follow their instructions exactly
Stay on line unless instructed otherwise
PREVENTION IS THE BEST EMERGENCY PLAN
Most Emergencies Are Preventable:
- Check weather conditions before departure
- Inspect vehicle thoroughly before ascent
- Carry proper emergency supplies
- Travel with others when possible
- Inform people of your plans and expected return
- Turn back early if conditions deteriorate
- Respect your limits and experience level
Remember: Mountain Rescue is Expensive and Dangerous
- Helicopter rescue: $3,000-$10,000+
- Ground rescue: Hours of delay in challenging conditions
- Risk to rescuers: Your emergency becomes their risk
Weather delays: Rescue may be impossible during storms
FINAL EMERGENCY WISDOM
The mountain will be there tomorrow. Make sure you are too.
Most Mauna Kea Summit emergencies result from:
- Poor planning – inadequate preparation for conditions
- Bad decisions – continuing when conditions deteriorate
- Equipment failure – vehicle or gear not suited for mountain
- Overconfidence – underestimating mountain’s challenges
- Time pressure – rushing leads to dangerous choices
Your safety is more important than reaching the summit.
Turn back early, ask for help when needed, and remember that successful mountaineers are those who make good decisions, not just those who reach the top.
Print this emergency guide and keep it accessible during your Mauna Kea Summit adventure. Share this information with all members of your group. Hope you never need it, but be prepared if you do.