An Adventure Guide for Hikers and Road-Trippers Eager to Summit the Highest Point in the Pacific
Table of Contents
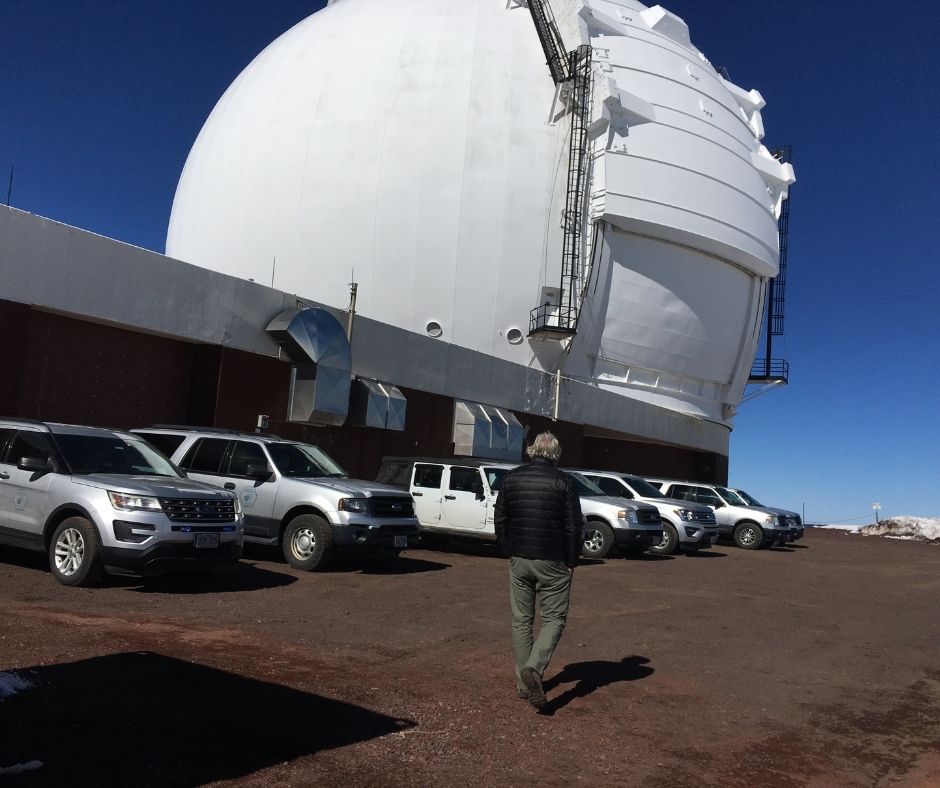
Roof of the Pacific
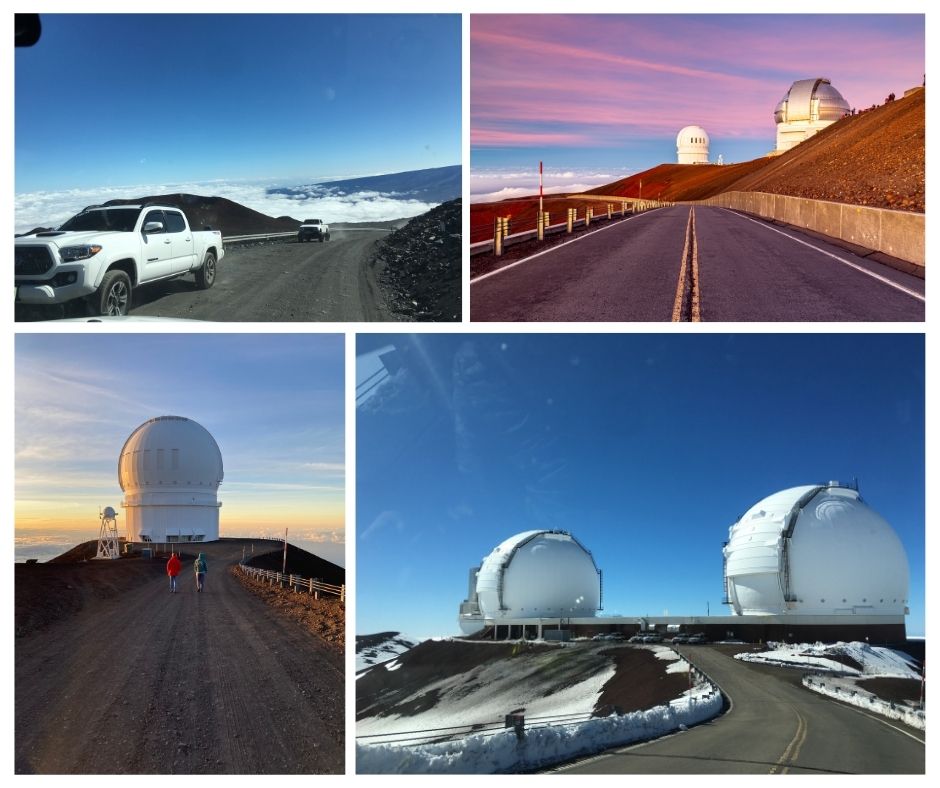
Picture this: You’re standing above a sea of clouds at nearly 14,000 feet, where the air is so thin you can almost taste the stars, and the silence is so profound it feels sacred. This isn’t a dream—this is Mauna Kea Mountain, Hawaii’s towering giant and the tallest peak in the Pacific.
When measured from its base on the ocean floor, Mauna Kea actually stands taller than Mount Everest at over 33,000 feet. But here’s what makes this dormant volcano truly extraordinary: it’s simultaneously one of the most sacred sites in Hawaiian culture, home to world-class astronomical observatories, and surprisingly accessible to adventurous travelers like you.
Whether you’re a seasoned backpacker who’s conquered peaks across continents, a curious tourist renting your first 4WD vehicle, or someone who simply wants to experience what it feels like to touch the edge of heaven—this comprehensive guide will equip you with everything you need to reach the Mauna Kea summit safely, respectfully, and unforgettably.
As someone who’s guided hundreds of travelers up this majestic mountain over the past decade, I’ve witnessed first-hand the transformative power of standing atop Mauna Kea. I’ve seen tough hikers moved to tears by the sunrise, watched families bond over the shared challenge of the ascent, and helped countless visitors understand why Native Hawaiians consider this mountain the meeting place between earth and sky.
How Long Does it Take to Drive to the Summit of Mauna Kea?
The short answer: About 30 minutes from the Visitor Center to the summit, but plan 2-2.5 hours total travel time from major towns.
Time on Mauna Kea moves differently than time at sea level—and I don’t just mean because you’re in a different time zone! The combination of altitude, technical driving, and sheer awe factor means every estimate needs a buffer.
I learned this lesson early in my guiding career when I promised a photography group we’d reach the summit in “20 minutes, easy” from the Visitor Center. Forty-five minutes later, we were still climbing, having stopped for a vehicle overheating issue and two photo opportunities that were simply too spectacular to pass up.
Realistic Time Breakdown:
From Hilo:
- To Visitor Center: 45 minutes via Saddle Road
- Acclimatization stop: 30-45 minutes (essential)
- Visitor Center to Summit: 30-45 minutes
- Total: 2-2.5 hours minimum
From Kona:
- To Visitor Center: 1.5 hours via Saddle Road
- Acclimatization stop: 30-45 minutes
- Visitor Center to Summit: 30-45 minutes
- Total: 2.5-3 hours minimum
Why the Summit Drive Takes Longer Than Expected:
- Technical terrain: You can’t rush on loose cinder and steep grades
- Altitude effects: Thin air affects decision-making and reaction time
- Photo stops: The views are legitimately irresistible
- Traffic: Other vehicles moving slowly create convoy situations
- Weather delays: Sudden fog banks can stop progress entirely
Descent Considerations: Here’s what many visitors don’t consider—the descent often takes longer than the ascent. Your brakes work harder, you’re more tired from altitude exposure, and afternoon weather tends to be more challenging.
I remember Carlos, an experienced off-road driver from Arizona, who boasted he’d “fly up and down” Mauna Kea. Three hours later, he emerged from his vehicle at the Visitor Center, sweating and shaking slightly. “That descent was like riding the brakes for 45 minutes straight,” he told me. “My hands are cramped from gripping the steering wheel.”
Golden Rule for Timing:
- Start descent by 4 PM for comfortable daylight return
- Never drive summit road after dark (seriously, don’t)
- Add 50% buffer time to all estimates
- Plan for equipment stops: Photo gear, water breaks, vehicle checks
Traffic Pattern Reality:
- Morning rush: 8 AM-10 AM (sunrise chasers and tour groups)
- Midday calm: 11 AM-1 PM (best time for relaxed driving)
- Afternoon exodus: 2 PM-4 PM (everyone heading down before dark)
Emergency Time Considerations: Cell service is nonexistent on the summit road. If something goes wrong—mechanical failure, medical emergency, weather emergency—help can be hours away. This isn’t a place where you can call AAA and wait comfortably.
Pro Timing Strategy: I always recommend the “inverse schedule”—start with your desired departure time and work backward:
- Want to leave the summit by 4 PM?
- Arrive summit by 2 PM
- Leave Visitor Center by 1:15 PM
- Arrive Visitor Center by 12:30 PM
- Leave sea level by 11 AM (from Hilo) or 9:30 AM (from Kona)
Mauna Kea teaches patience. The mountain sets the pace, not your schedule. Embrace the slower rhythm, and you’ll discover that the journey becomes as memorable as the destination.
Is There a Shuttle to Mauna Kea Summit?
The short answer: No public shuttle service exists, but commercial astronomy tours provide the most accessible summit transportation.
This question breaks my heart a little every time I hear it, because it usually comes from visitors who’ve discovered they can’t drive to the Mauna Kea summit themselves—whether due to rental car restrictions, physical limitations, or simply lack of confidence on technical mountain roads.
I remember meeting Eleanor, a 72-year-old astronomy enthusiast from Maine, who’d dreamed of visiting Mauna Kea’s world-famous observatories for decades. She’d assumed there would be public transportation like the shuttle buses at Grand Canyon or Zion National Park. When she learned there wasn’t, her face fell. “I’ve come all this way,” she said quietly.
Why No Public Shuttle Exists:
- Terrain challenges: The summit road is too technical for standard buses
- Limited infrastructure: No facilities to support regular shuttle operations
- Weather variability: Frequent closures would make scheduled service unreliable
- Environmental protection: Limiting vehicle traffic helps preserve the fragile ecosystem
- Cultural sensitivity: Reducing commercial traffic respects the sacred nature of the site
Commercial Tour Alternatives: The tourism industry has filled this gap with specialized services:
Astronomy Tour Companies:
- Mauna Kea Summit Adventures: Full-day experiences with sunset and stargazing
- Arnott’s Lodging and Adventures: Budget-friendly group tours with local guides specializing in sunset and stargazing
- Hawaii Forest & Trail: Premium small-group experiences with naturalist guides
- Big Island Revealed: Photography-focused tours for serious amateur photographers
Tour Advantages:
- Proper vehicles: Commercial-grade 4WD vans designed for the summit road
- Expert guides: Professional knowledge of astronomy, culture, and safety
- Equipment provided: Telescopes, warm clothing, refreshments
- Weather flexibility: Tours adapt or reschedule for optimal conditions
- Cultural context: Guides explain the spiritual and scientific significance
Eleanor’s Happy Ending: Eleanor booked a tour with us at Arnott’s Lodging and Adventures. Not only did she reach the Mauna Kea summit, but she had a chance to admire the Milky Way, Saturn, and Jupiter. “This was better than any shuttle could have been,” she told me later. “I learned things I never would have discovered on my own.”
DIY Alternatives to Shuttle Service:
- Rideshare arrangements: Connect with other travelers through hostel bulletin boards
- Tour company day trips: Many offer transportation-only options without full programs
- Local guide services: Individual guides who provide custom experiences
- 4WD taxi services: Limited availability but exists for determined visitors
Cost Considerations: Professional tours range from $240-$350 per person, which initially seems expensive. However, when you factor in 4WD rental costs, gas, insurance, and the value of expert knowledge, tours often provide better value than independent travel.
Booking Strategy:
- Reserve early: Popular tours fill up, especially during new moon periods
- Weather flexibility: Choose companies that offer rescheduling options
- Group size: Smaller groups provide more personalized experiences
- Equipment inclusion: Verify what’s provided vs. what you need to bring
Special Accessibility Note: Several tour companies accommodate visitors with mobility challenges, using modified vehicles and shorter walking distances. Always discuss specific needs when booking.
The absence of public shuttle service to Mauna Kea summit is actually a blessing in disguise—it ensures that only prepared, committed visitors make the journey, preserving both the mountain’s sacred character and its pristine environment.
Is the Road to Mauna Kea Visitor Center Paved?
The short answer: Yes, Saddle Road is completely paved from sea level to the Mauna Kea Visitor Information Station.
This might seem like a simple question, but it addresses a major misconception that keeps many visitors away from Mauna Kea entirely. I regularly encounter tourists who’ve heard horror stories about “dangerous unpaved roads” and assume the entire mountain is inaccessible to normal vehicles.
Just last month, I met Sandra and Bill, retirees from Arizona traveling in their Honda CR-V. They’d planned to skip Mauna Kea entirely after reading outdated travel forums warning about “treacherous dirt roads.” When I explained that they could easily reach the Visitor Center in their vehicle, their entire itinerary changed.
Saddle Road Reality:
- Fully paved: Smooth asphalt from Hilo to the Visitor Center
- Well-maintained: Regular maintenance keeps the road in excellent condition
- Clearly marked: Good signage throughout the route
- Any vehicle: Cars, vans, motorcycles, RVs can all make this drive
- Scenic drive: One of Hawaii’s most spectacular routes
The Road Evolution Story: Saddle Road used to deserve its bad reputation. Until the 2000s, it was indeed a rough, winding track that rental car companies prohibited. The transformation is remarkable—modern Saddle Road is actually superior to many mainland highways.
Current Road Characteristics:
- Distance: 45 minutes from Hilo, 1.5 hours from Kona
- Elevation gain: Gradual climb from sea level to 9,200 feet
- Grade: Gentle enough for any vehicle
- Width: Standard two-lane highway with good sight lines
- Guardrails: Proper safety barriers at appropriate locations
What Creates Confusion: The misunderstanding stems from the summit road, which branches off at the Visitor Center and is indeed unpaved, steep, and requiring 4WD. Many visitors conflate the two completely different road segments.
Paved vs. Unpaved Sections:
- Paved (any vehicle): Sea level to Visitor Center at 9,200 feet
- Unpaved (4WD only): Visitor Center to summit at 13,803 feet
- Critical distinction: You can experience 80% of Mauna Kea on paved roads alone
Sandra and Bill’s Experience: They made the drive in their CR-V and were amazed by the easy access. “We expected something like a mining road,” Bill laughed. “Instead, it was more comfortable than our drive through the Rockies last year.” They spent four hours at the Visitor Center, enjoyed sunset viewing, and called it a highlight of their Hawaiian vacation.
Weather Considerations: While the road is paved, weather can still create challenges:
- Fog: Dense clouds frequently reduce visibility
- Rain: Sudden downpours can make driving treacherous
- Wind: High-profile vehicles feel strong crosswinds
- Temperature: Road can be icy in winter conditions
Rental Car Implications: Most rental contracts now allow Saddle Road travel to the Visitor Center, but always verify:
- Read your contract: Some companies still restrict Saddle Road
- Insurance coverage: Ensure you’re covered for the elevation
- Vehicle capability: Any car can handle the paved section
The 80% Solution: Here’s a secret many visitors never discover: the Visitor Center provides 80% of the Mauna Kea experience with 20% of the complexity. You get:
- Spectacular views: Often superior to summit on cloudy days
- Stargazing: Excellent dark-sky conditions
- Cultural education: Ranger programs and interpretive displays
- Unique ecosystems: Transition from tropical to alpine environments
- Sunset viewing: Dramatic colors without summit crowds
Best of Both Worlds Strategy: Smart visitors use this knowledge strategically:
- Drive to Visitor Center in any vehicle for guaranteed access
- Assess conditions for potential summit travel
- Enjoy Visitor Center activities as primary experience
- Consider summit tours if weather permits and interest warrants
Misconception Damage: The persistent belief that Mauna Kea requires special vehicles keeps thousands of visitors away unnecessarily. Hawaii tourism statistics show that less than 30% of Big Island visitors even attempt Mauna Kea access, largely due to these outdated concerns.
Quality Control: The Hawaii Department of Transportation maintains Saddle Road to high standards because it serves as a critical link between Hilo and Kona. The road quality often surprises mainland visitors expecting primitive conditions.
The paved road to Mauna Kea Visitor Center democratizes access to one of Hawaii’s most extraordinary destinations. Don’t let outdated information prevent you from experiencing this accessible wonder.
Can You Summit Mauna Kea Without a Tour?
The short answer: Yes, independent summit access is permitted and rewarding for properly prepared visitors.
The question of independent vs. guided Mauna Kea access touches the heart of adventure travel philosophy: Do you want the flexibility and accomplishment of self-guided exploration, or the expertise and safety net of professional guidance?
I’ve guided both types of visitors—DIY adventurers and tour-dependent travelers—and both approaches can create magical experiences when matched to the right person and circumstances.
Independent Access Advantages:
- Complete schedule control: Leave when you want, stay as long as you want
- Cost savings: Significant financial savings compared to commercial tours
- Personal achievement: Deep satisfaction from navigating challenges independently
- Photographic freedom: No rush to accommodate group schedules
- Intimate experience: Avoid crowds and commercial atmospheres
Success Requirements for Independent Travel:
- Proper vehicle: 4WD rental from approved company
- Mountain driving experience: Previous technical terrain navigation
- Physical preparation: Altitude readiness and cold weather gear
- Safety consciousness: Emergency planning and risk assessment
- Cultural awareness: Understanding of sacred site protocols
- Weather monitoring: Real-time condition assessment skills
What You’ll Miss Without Professional Guidance:
Astronomical Knowledge: I remember meeting Kevin, a software engineer who successfully reached the summit independently but spent an hour staring at Jupiter without realizing what he was seeing. “I knew it was bright and beautiful,” he said, “but I had no idea I was looking at the largest planet in our solar system.”
Cultural Context: The spiritual significance of Mauna Kea has layers that aren’t obvious to casual visitors. Professional guides share stories, traditions, and perspectives that transform a scenic drive into a cultural journey.
Safety Expertise: Guides recognize subtle signs of altitude sickness, weather deterioration, and mechanical stress that inexperienced visitors often miss.
Equipment Access: Tours provide telescopes, warm clothing, and specialized gear that enhance the experience significantly.
Independent Success Strategy:
- Research thoroughly: Study weather patterns, cultural protocols, and safety requirements
- Start conservatively: Visit Visitor Center first to assess your altitude response
- Rent proper equipment: Good 4WD vehicle from approved rental company
- Plan backup activities: Have alternatives if summit access is closed
- Respect the mountain: Follow all posted guidelines and cultural protocols
Hybrid Approach Success: Many of my most satisfied visitors combine independent and guided elements:
- Drive independently to demonstrate self-reliance
- Join evening stargazing at Visitor Center for astronomical education
- Return independently for photography or personal reflection
Legal and Ethical Considerations:
- Permitted activity: Independent access is completely legal
- Cultural respect: Research Hawaiian protocols and sacred site etiquette
- Environmental impact: Practice strict Leave No Trace principles
- Emergency preparedness: Understand you’re responsible for self-rescue
Risk Assessment Reality: Independent Mauna Kea travel involves real risks:
- Altitude sickness: Can become serious without proper recognition
- Weather changes: Conditions deteriorate rapidly and dangerously
- Mechanical failures: Remote location complicates vehicle problems
- Navigation challenges: Limited signage and cell service
When to Choose Tours Instead:
- Limited mountain driving experience
- Medical conditions that could be aggravated by altitude
- Primary interest in astronomy rather than adventure driving
- Weather uncertainty during your visit window
- Group travel with varying experience levels
The Middle Path: Many successful independent visitors follow a “graduated approach”:
- Day 1: Drive to Visitor Center independently to test abilities and comfort
- Day 2: Join a commercial tour to gain knowledge and experience
- Day 3: Return independently with improved understanding and confidence
Independence Rewards: There’s something profound about standing atop Mauna Kea knowing you navigated every challenge yourself. The silence feels deeper, the views more earned, the connection more personal. It’s the difference between being shown paradise and discovering it yourself.
Independent Mauna Kea summit access represents classic adventure travel—high reward for those who accept the preparation requirements and inherent risks. Done thoughtfully, it becomes not just a destination reached, but a mountain conquered and a confidence earned.
Can You Hike from Mauna Kea Visitor Center to the Summit?
The short answer: Yes, via the challenging Humuʻula Trail—a 6-mile, 4,500-foot elevation gain that typically takes 6-10 hours round-trip.
Let me tell you about Jake, an ultra-marathon runner from Colorado who laughed when I warned him about the Mauna Kea summit hike. “I run 50-mile races at altitude,” he said dismissively. “This will be a warm-up.”
Six hours later, Jake was sitting on a rock at 12,000 feet, completely exhausted, with still 2,000 feet of elevation and 2 miles to go. The thin air had humbled one of the fittest people I’d ever met. He made it to the summit but took nearly 12 hours round-trip—triple his original estimate.
Humuʻula Trail Reality Check:
- Distance: 6 miles one-way (12 miles total)
- Elevation gain: 4,500 feet from VIS to summit
- Starting elevation: 9,200 feet (already high altitude)
- Summit elevation: 13,803 feet (40% less oxygen than sea level)
- Terrain: Volcanic cinder, loose rock, no shade, no water sources
Why This Hike is Deceptively Difficult:
- Altitude compounds everything: Each step requires more effort than at sea level
- No water sources: You must carry all hydration for 12+ miles
- Weather exposure: Temperature swings from warm to freezing
- Loose footing: Volcanic cinder provides unstable traction
- No bailout options: Once committed, you must complete the full distance
Physical Requirements: This isn’t a hike for weekend warriors. Successful summiteers typically have:
- High-altitude experience: Previous hiking above 10,000 feet
- Excellent cardio fitness: Equivalent to running a half-marathon
- Mental toughness: Ability to push through discomfort for hours
- Navigation skills: Trail markers are minimal above tree line
Essential Hiking Gear:
- Water: Minimum 4 liters (1 gallon) per person
- Electrolytes: Altitude and exertion deplete minerals rapidly
- Food: High-energy snacks for sustained effort
- Layers: Temperature can vary 40°F from start to summit
- Sun protection: UV intensity increases dramatically with altitude
- Emergency supplies: First aid, emergency shelter, headlamp
- Trekking poles: Essential for stability on loose cinder
Timing Strategy:
- Start early: 4:30-5:00 AM departure for daylight completion
- Turnaround time: Set a firm deadline (typically 2 PM) regardless of progress
- Weather window: Check conditions hourly—afternoon storms are common
- Sunset deadline: Must be off summit before dark (no exceptions)
Success Stories and Cautionary Tales:
Success: Maria and Roberto, experienced Andes hikers from Peru, approached the Humuʻula Trail with proper respect. They trained for two weeks at altitude in Cusco, carried proper gear, and started at 4:45 AM. Their 8-hour round-trip became a life-changing experience. “We’ve climbed in the Himalayas,” Maria said, “but there’s something magical about Mauna Kea that goes beyond the physical challenge.”
Caution: Brad, a gym enthusiast from sea level, attempted the hike in running shoes with a single water bottle. He developed severe altitude sickness at 11,000 feet and required assistance from other hikers to descend safely. His “quick morning hike” became a dangerous rescue situation.
Trail Conditions:
- Lower section: Well-marked through māmane forest
- Mid-section: Increasingly sparse vegetation and thinner air
- Upper section: Lunar-like landscape with minimal trail markers
- Summit approach: Steep, loose cinder requiring careful footing
Alternative Hiking Options:
- Partial hike: Many visitors hike 2-3 miles for excellent views without summit pressure
- Sunrise position: Hike to Lake Waiau area for spectacular dawn viewing
- Training hike: Use as preparation for other Big Island volcano hikes
When NOT to Attempt:
- Poor weather: High winds, fog, or precipitation
- Medical conditions: Heart, lung, or circulation issues
- Inadequate preparation: Less than excellent physical condition
- Time constraints: Rushing leads to dangerous decisions
- Solo hiking: Remote location makes solo travel very risky
The Humuʻula Trail to Mauna Kea summit represents one of Hawaii’s most challenging day hikes. It demands the same level of preparation and respect you’d give to serious mountain climbing anywhere in the world. Done properly, it’s an achievement you’ll remember forever. Done carelessly, it can become a life-threatening situation.
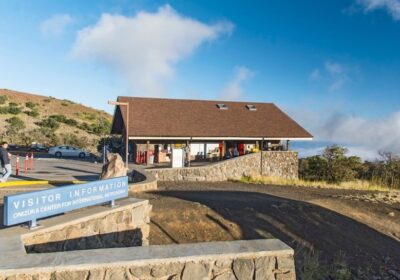
What to Do at Mauna Kea Visitor Center?
The short answer: Acclimatize, attend ranger programs, explore short trails, and enjoy some of Hawaii’s best stargazing—all while preparing for summit adventures.
Many visitors treat the Mauna Kea Visitor Information Station as just a pit stop on their way to bigger things. That’s like stopping at Base Camp Everest just to use the bathroom—you’re missing incredible experiences right under your nose.
I learned this lesson from Amy, a solo traveler from New Zealand who had altitude sensitivity that prevented summit travel. Instead of being disappointed, she spent an entire day at the VIS and declared it “the highlight of my Big Island trip.” Her enthusiasm reminded me why this location deserves destination status, not just waypoint treatment.
Acclimatization Activities (Essential for Summit-Bound Visitors):
- Minimum 30-45 minutes: Allow your body to adjust to 9,200-foot elevation
- Gentle walking: Explore the area to test your altitude response
- Hydration station: Drink water consistently—dehydration amplifies altitude effects
- Physical assessment: Monitor for headache, nausea, or unusual fatigue
Ranger Programs and Educational Opportunities:
- Cultural presentations: Learn about Mauna Kea’s sacred significance in Hawaiian tradition
- Astronomy talks: Understanding the mountain’s role in cutting-edge space research
- Safety briefings: Essential information for summit-bound visitors
- Natural history: Geology, ecology, and climate of this unique environment
Short Hiking Trails:
Silversword Loop Trail (0.5 miles): This easy walk showcases the rare Mauna Kea silversword plant, found nowhere else on Earth. The trail offers excellent views without significant elevation gain—perfect for altitude testing.
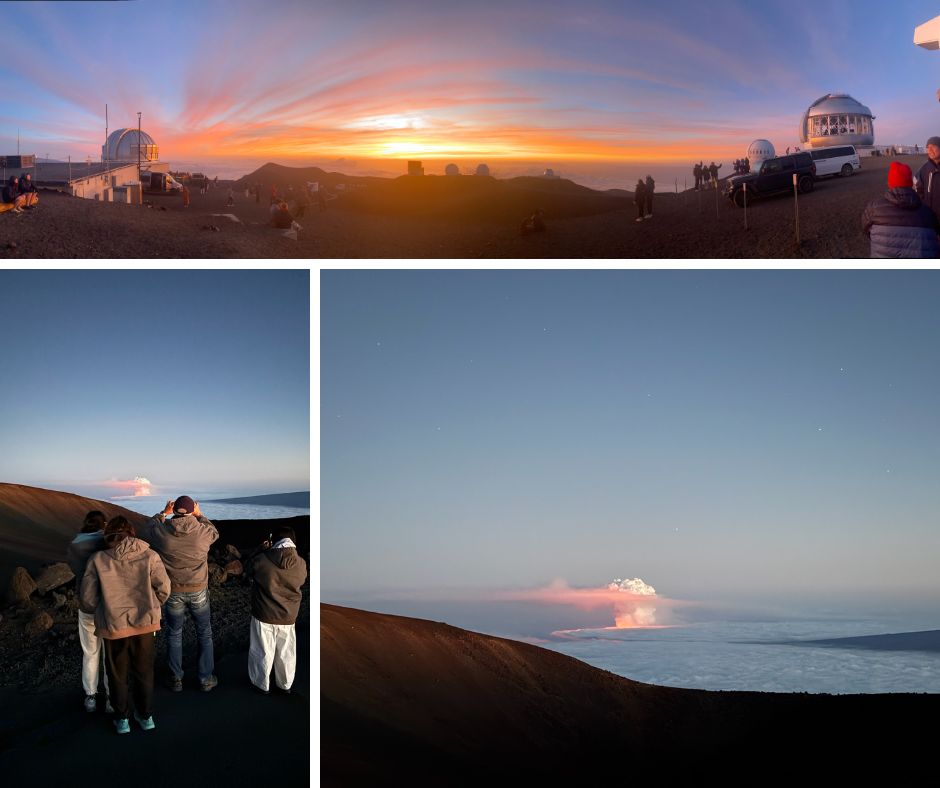
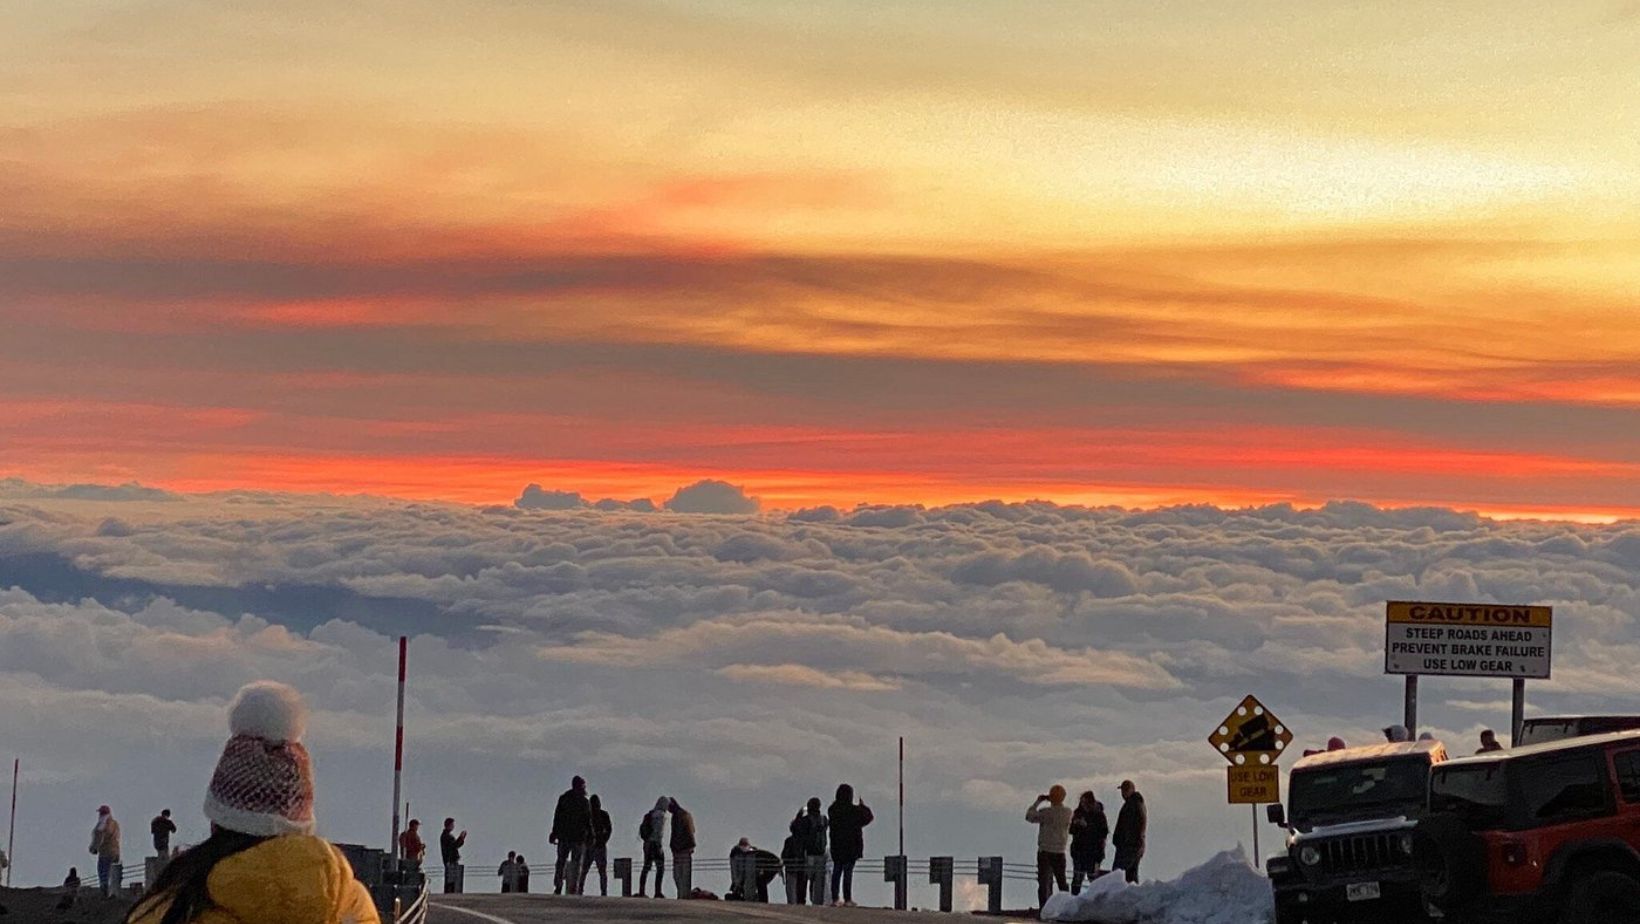
Sunset Hill (0.3 miles): A gentle climb to an excellent sunset viewing area. Many visitors discover this spot rivals the summit for spectacular evening colors, especially when clouds fill the valleys below.
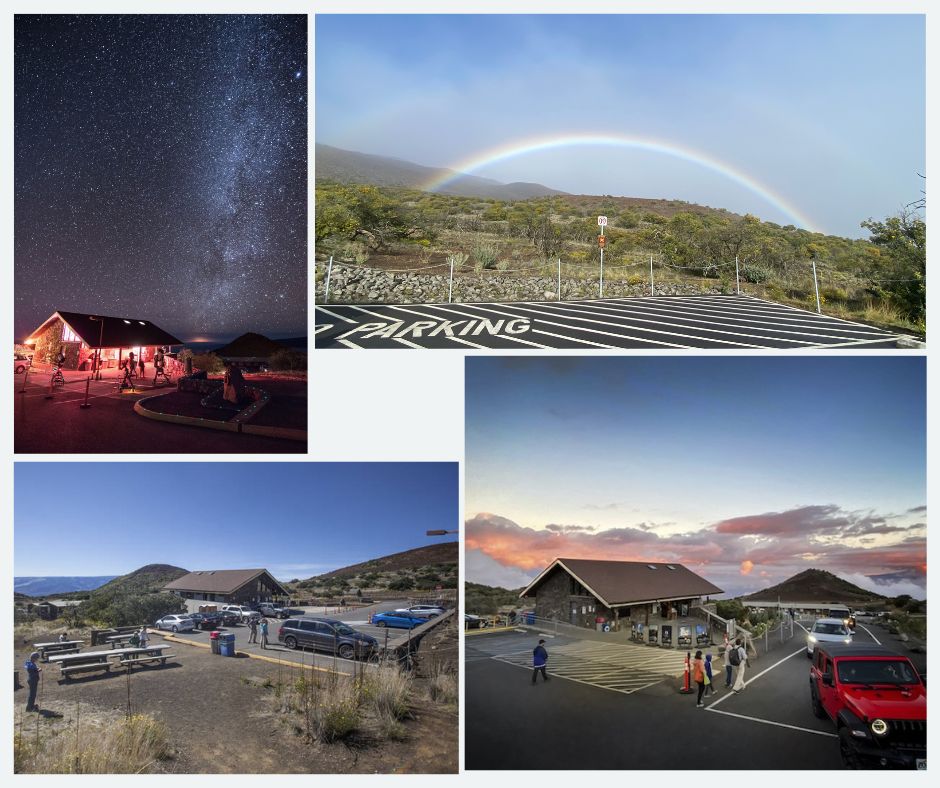
Stargazing Programs: The VIS hosts some of Hawaii’s best public astronomy programs:
- Free telescope viewing: Usually Friday-Sunday nights when staff available
- Star maps and guides: Learn to navigate Hawaiian skies independently
- Dark sky experience: Minimal light pollution creates exceptional viewing conditions
- Photography opportunities: Excellent astrophotography conditions
Photography and Scenic Opportunities:
- Cloud forest views: Watching clouds form and dissipate below you
- Sunset photography: Dramatic light on neighboring Mauna Loa
- Silversword plants: Unique endemic species perfect for macro photography
- Wide-angle landscapes: Volcanic terrain stretching to the ocean
Facilities and Amenities:
- Restrooms: The last facilities available before wilderness areas
- Water fountains: Fill bottles for summit travel or hiking
- Picnic areas: Sheltered spots for meals with spectacular views
- Gift shop: Well-curated selection of astronomy and Hawaiian cultural items
- Information displays: Interactive exhibits about mountain ecology and astronomy
Weather Monitoring Station: The Visitor Center serves as your intelligence center for summit conditions:
- Real-time updates: Current temperature, wind, and visibility data
- Forecast information: Help plan optimal timing for summit attempts
- Road closure status: Critical information for summit-bound travelers
Amy’s Perfect Visitor Center Day: Amy arrived at 10 AM and started with the silversword trail. She attended a ranger talk about Hawaiian astronomy traditions, then spent lunch watching clouds dance through the valleys below. As afternoon shifted to evening, she joined other visitors for sunset viewing, followed by the weekly stargazing program. “I saw Saturn’s rings through a telescope,” she told me excitedly. “I learned constellations I’d never noticed. I understood why this mountain is sacred. I never made it to the summit, but I had a complete Mauna Kea experience.”
Timing Your Visitor Center Visit:
- Morning: Best for hiking and ranger programs
- Midday: Excellent for acclimatization and education
- Afternoon: Perfect for sunset preparation and photography
- Evening: Prime time for stargazing programs (when available)
Cost-Effective Strategy: The Visitor Center offers premium mountain experiences at zero cost. Many visitors spend hundreds on summit tours without realizing they can access excellent stargazing, cultural education, and scenic beauty for free. Smart travelers use the Visitor Center as their primary Mauna Kea experience, saving money while maximizing value.
Connection to Summit Travel: Whether you’re planning to drive, hike, or tour to the summit, the Visitor Center provides essential preparation. You’ll test your altitude response, gather current conditions, understand cultural context, and build excitement for the full mountain experience.
The Mauna Kea Visitor Information Station represents the perfect introduction to Hawaii’s most sacred mountain—accessible, educational, beautiful, and completely free.
How Do I Prepare for the Mauna Kea Summit?
The short answer: Physical acclimatization, proper gear, mental preparation, and respect for the mountain’s power.
Preparation for Mauna Kea isn’t just about packing the right jacket—it’s about understanding that you’re entering an environment as foreign as another planet. I’ve seen Navy SEALs struggle with altitude sickness and experienced mountaineers humbled by the rapid elevation change.
Physical Preparation Checklist:
Altitude Acclimatization Protocol:
- Mandatory VIS stop: Minimum 30 minutes, ideally 45-60 minutes
- Hydration: Start 24 hours before—dehydration amplifies altitude effects
- Avoid alcohol: Even small amounts compound altitude sickness
- Light eating: Heavy meals divert blood from oxygen transport
- Know your limits: Headache, nausea, dizziness = time to descend
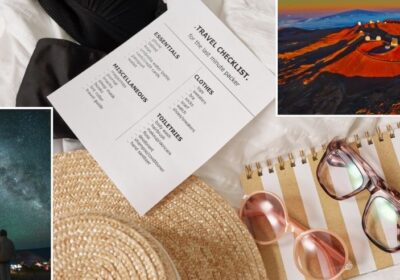
Essential Gear Inventory:
- Layered clothing system: Base layer, insulating layer, wind/waterproof shell
- Warm accessories: Hat, gloves, neck protection, warm socks
- Sun protection: UV exposure is intense at altitude (SPF 30+ minimum)
- Eye protection: Sunglasses and clear safety glasses for wind
- Emergency supplies: First aid kit, flashlight, emergency blanket
- Communication: Satellite communicator if available (cell service is nonexistent)
Vehicle Preparation:
- Fuel: Start with full tank—engines work harder at altitude
- Fluids: Check oil, coolant, brake fluid before attempting summit
- Tires: Ensure good tread for loose cinder traction
- Emergency kit: Jumper cables, basic tools, extra water
Mental and Cultural Preparation:
This is where many visitors miss the deeper significance of their journey. Mauna Kea isn’t just a mountain—it’s Mauna a Wākea, the sacred realm where Wakea (sky father) and Papa (earth mother) meet.
Cultural Respect Guidelines:
- Sacred sites: Some areas are kapu (forbidden)—respect all barriers and signs
- Behavioral expectations: Quiet voices, respectful demeanor, no loud music
- Leave no trace: Pack out everything, disturb nothing
- Photography ethics: Ask permission before photographing ceremonies or people
Risk Assessment Planning:
- Weather monitoring: Check conditions hourly—mountain weather changes rapidly
- Backup plans: Always have alternative activities if summit is closed
- Emergency contacts: Inform others of your plans and expected return
- Medical considerations: Consult doctors if you have heart, lung, or circulation issues
Real-World Preparation Story: I’ll never forget Lisa, a thorough planner from Vancouver who spent weeks researching Mauna Kea. She arrived with a laminated checklist, proper gear, and detailed itinerary. But she’d overlooked one thing—her rental car contract prohibited summit driving.
Instead of panicking, Lisa adapted beautifully. She hiked the Humuʻula Trail from the Visitor Center to the summit—a challenging 6-mile trek that became the highlight of her Hawaiian vacation. “The preparation I did for driving actually made me ready for hiking,” she reflected. “Sometimes the mountain has different plans than we do.”
Pre-Departure Self-Assessment: Ask yourself honestly:
- Am I physically ready for thin air and temperature extremes?
- Do I have appropriate gear for all weather conditions?
- Is my vehicle properly equipped and legally allowed?
- Do I understand and respect the cultural significance?
- Have I planned for emergencies or weather closures?
- Am I flexible enough to change plans if conditions demand it?
The 24-Hour Rule: Start your preparation 24 hours before departure. Hydrate consistently, get good sleep, eat well, and mentally prepare for an experience that’s part physical challenge, part spiritual journey, and completely unforgettable.
Remember: Mauna Kea doesn’t grade on effort—it demands competence. Proper preparation transforms a potentially dangerous situation into a life-changing adventure.
How Cold is the Mauna Kea Summit?
The short answer: Extremely cold—often below freezing, even when it’s 80°F at sea level.
I’ll never forget the look on Maria’s face when she stepped out of her rental SUV at the Mauna Kea summit wearing shorts and a tank top. It was a gorgeous 82°F day in Kona, and she figured Hawaii meant perpetual warmth. Within seconds, she was back in the vehicle, teeth chattering, asking if I had any extra jackets.
“But it’s Hawaii!” she protested, as I handed her a spare fleece from my guide kit. That’s the Mauna Kea reality check—you can literally go from tropical paradise to alpine conditions in less than two hours of driving.
Temperature Reality Check:
- Summer: 30°F to 50°F at the summit
- Winter: Can drop below 20°F with wind chill
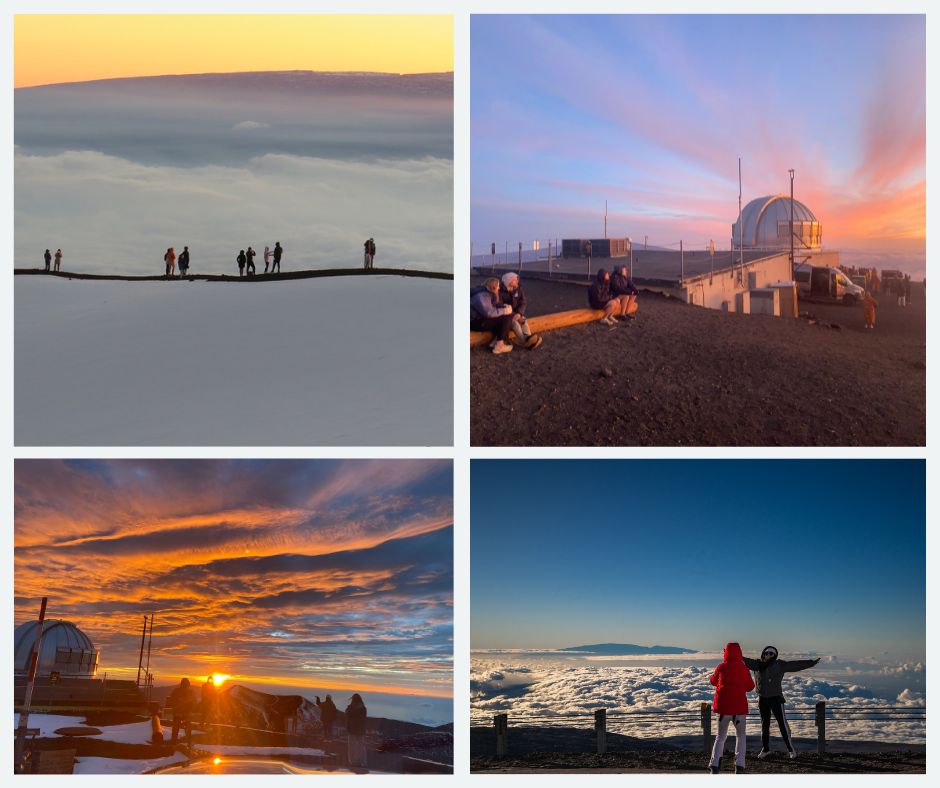
- Snow: Yes, snow regularly blankets Mauna Kea from December through February
- Wind Factor: Sustained winds of 30+ mph are common, making it feel much colder
The 40-Degree Rule: For every 1,000 feet of elevation gain, temperature drops about 3-4°F. Starting from sea level at 80°F, you’ll lose roughly 40°F by the time you reach the Mauna Kea summit. It’s like traveling from Miami to Minnesota in 90 minutes.
I’ve guided visitors who’ve experienced frost forming on their water bottles while watching sunrise, and others who’ve seen their breath in the thin air during July heat waves. The mountain doesn’t care what season it is down below—it has its own climate rules.
Essential Cold Weather Packing:
- Insulated jacket (down or synthetic)
- Warm hat that covers your ears
- Insulated gloves (trust me, metal camera equipment gets brutally cold)
- Thick wool socks and closed-toe shoes
- Multiple layers for temperature regulation
- Neck gaiter or scarf for wind protection
Maria learned her lesson and returned the next day properly dressed. She spent two hours at the summit, comfortably watching clouds form and dissipate below her feet. “I never imagined I’d need winter gear in Hawaii,” she laughed, “but now I understand why Mauna Kea feels so magical—it’s literally another world up here.”
Where Do You Park at Mauna Kea Summit?
The short answer: Limited designated parking areas at the summit, with overflow parking at the Visitor Information Station.
Let me paint you a picture of summit parking reality: It’s 5:30 AM, and you’ve made the challenging drive up the Mauna Kea summit road in darkness, hoping to catch the legendary sunrise. You arrive to find cars parked everywhere—some in designated spots, others creating their own spaces dangerously close to telescope access roads.
This scene plays out regularly, especially during astronomical events or perfect weather weekends. I’ve seen frustrated visitors turn around after driving two hours because they couldn’t find safe parking.
Official Summit Parking Areas:
- Primary lot: Small designated area near the summit observatories
- Roadside parking: Limited pull-offs along the summit road
- Capacity: Approximately 30-40 vehicles maximum
- Rules: First-come, first-served (no reservations possible)
Critical Parking Guidelines:
- Never block telescope access roads: These are working scientific facilities with strict access requirements
- Stay off the cinder: Parking on the volcanic cinder damages the fragile ecosystem
- Emergency access: Keep fire lanes and emergency routes clear
- Visitor safety: Don’t park where your vehicle could roll or slide
Alternative: Visitor Information Station Parking: Located at 9,200 feet, the Visitor Center parking area offers a reliable backup plan. From here, you can:
- Hike to summit: 6-mile Humuʻula Trail (challenging but doable)
- Wait for space: Monitor summit parking via other visitors
- Enjoy excellent views: VIS offers spectacular vistas without summit crowds
Pro Parking Strategy: I always tell my groups: “Arrive early, stay flexible, have backup plans.” The most successful summit visitors I’ve guided arrive by 4:30 AM for sunrise or depart by 4 PM for sunset. Peak congestion happens between 10 AM-2 PM and during evening stargazing hours.
Remember, Mauna Kea isn’t Disneyland—there’s no infrastructure for managing crowds. Parking is primitive, spaces are limited, and Mother Nature sets the schedule. Plan accordingly, and always have a backup plan for busy days.
Do You Need 4-Wheel Drive to Go to the Mauna Kea Visitor Center?
The short answer: No, any vehicle can reach the Mauna Kea Visitor Information Station.
This is one of the most common misconceptions I encounter. Just last week, I met a family from Seattle who’d rented an expensive 4WD vehicle specifically for visiting the Visitor Center, not realizing their minivan would have worked perfectly fine.
The Reality of Road Access:
- Saddle Road to VIS: Completely paved, well-maintained highway
- Vehicle Requirements: Any car, van, or motorcycle can make this drive
- Elevation: 9,200 feet (significant but manageable for all vehicles)
- Distance: About 45 minutes from Hilo, 1.5 hours from Kona
What Makes This Confusing: The Visitor Center sits at the junction between the paved access road and the notorious unpaved summit road. Many visitors see 4WD vehicles everywhere and assume they need one, but those vehicles belong to people continuing to the summit.
Weather Considerations: While 4WD isn’t required for the Visitor Center, road conditions can still be challenging:
- Fog: Dense clouds frequently obscure the road
- Rain: Sudden downpours can reduce visibility to near zero
- High winds: Strong crosswinds affect all vehicles, especially high-profile ones
I remember guiding a couple in a Honda Civic who were nervous about the drive. “We made it!” they announced proudly upon arrival. They spent the afternoon at the Visitor Center, enjoyed the sunset views, and never felt they’d missed anything by not going to the actual summit.
Visitor Center Amenities Worth the Trip:
- Restrooms and water: The last facilities before wilderness
- Ranger programs: When available, these provide excellent cultural and scientific context
- Stargazing programs: Often superior to summit viewing due to organized telescopes
- Acclimatization opportunity: Essential if you’re planning summit travel later
- Gift shop: Small but well-curated selection of astronomy and Hawaiian items
Budget-Friendly Strategy: Save money by driving your regular rental car to the Visitor Center, then joining a commercial tour for summit access. You get the best of both worlds—independence for the scenic drive and professional expertise for the technical summit portion.
The Mauna Kea Visitor Information Station offers 80% of the mountain experience at 20% of the complexity. Don’t let vehicle requirements prevent you from experiencing this incredible destination.
Can You Drive a Rental Car to Mauna Kea Summit?
The short answer: It depends entirely on your rental company’s contract and vehicle type.
Here’s a cautionary tale that perfectly illustrates why this matters: Last year, I encountered David and Jennifer, adventure travelers from Germany who’d successfully driven rental cars up mountains across Europe. They figured Mauna Kea would be no different and took their standard rental sedan up the summit road.
Halfway up, their transmission started overheating on the steep grade. They made it to the summit but caused $3,000 in damage on the descent when their brakes failed. The rental company not only charged them for repairs but also imposed a hefty contract violation fee. Their Hawaiian adventure became a financial nightmare.
Rental Contract Reality:
- Standard rentals: Most major companies (Hertz, Enterprise, Budget) explicitly prohibit Mauna Kea summit driving
- Insurance void: Violating the contract can void your coverage entirely
- Damage liability: You’re personally responsible for all repair costs
- Towing expenses: Recovery from the summit road can cost $1,000+
Approved Rental Options:
- Harper Car Rentals: Big Island company specifically allowing Mauna Kea access
- 4WD specialists: Several local companies cater to adventure travelers
- Jeep/SUV rentals: Some national companies allow summit access with proper 4WD vehicles
- Always verify: Get written confirmation that summit driving is permitted
Vehicle Requirements for Summit:
- 4-wheel drive: Absolutely essential for the steep, unpaved road
- High clearance: Minimum 8 inches to clear rocks and ruts
- Low-range gearing: Crucial for controlling descent speed
- Good brakes: Extended steep descents demand excellent braking systems
The Insurance Investigation: Rental companies aren’t guessing—they track GPS data and know exactly where you’ve driven. I’ve seen visitors think they’re clever by cleaning off dust and dirt, only to receive violation notices weeks after returning home.
Smart Alternatives:
- Join a tour: Professional guides use properly equipped vehicles
- Local 4WD rental: Costs more but includes proper insurance coverage
- Hike from VIS: The Humuʻula Trail offers summit access without vehicle risks
- Stay at Visitor Center: Excellent experience without summit risks
David and Jennifer’s story has a happy ending—they returned the following year, rented from Harper Car Rentals, and had an amazing summit experience without financial stress. “We learned that some adventures are worth doing right the first time,” David told me.
Don’t let rental car issues ruin your Mauna Kea experience. Research your options, understand the contracts, and choose the approach that matches your risk tolerance and budget.
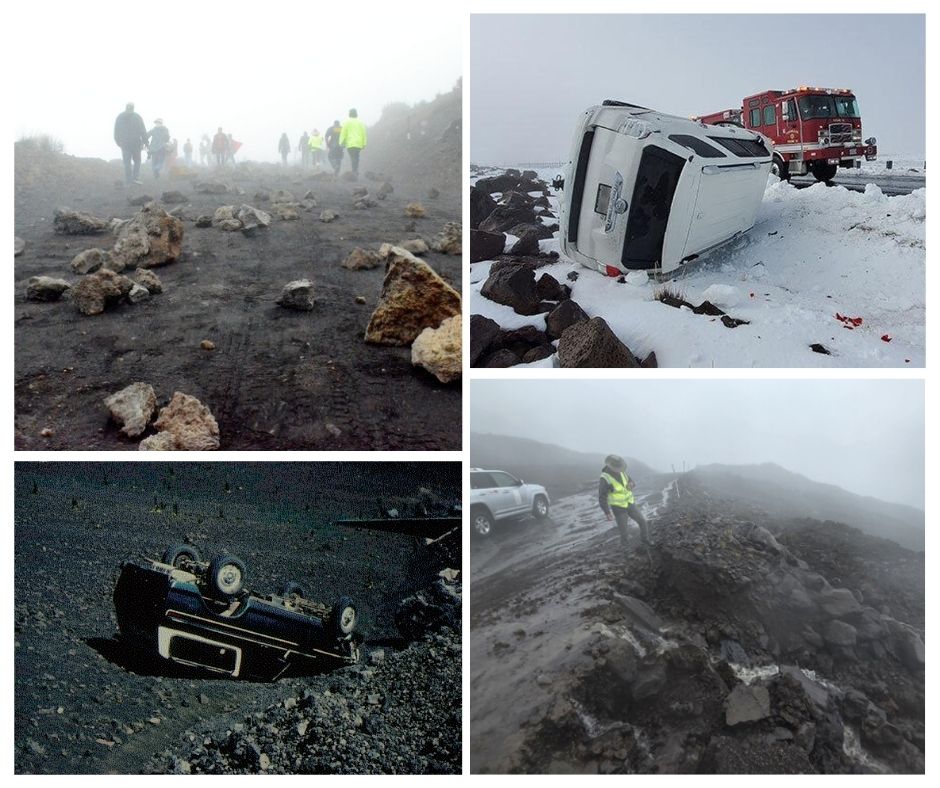
How Difficult is the Drive to Mauna Kea Summit?

The short answer: Very challenging—comparable to technical mountain passes in the Rockies or Andes.
Imagine the steepest, most winding mountain road you’ve ever driven. Now remove the guardrails, add loose volcanic rock, subtract about 40% of the available oxygen, and factor in weather that can change from clear to dangerous in minutes. That’s the Mauna Kea summit road.
I’ve guided thousands of visitors up this mountain, and I still respect this road every single time. It’s not about the distance—it’s only 4.5 miles from the Visitor Center to the summit—it’s about the technical demands and unforgiving consequences of mistakes.
Road Characteristics:
- Grade: Sustained 15-20% slopes (some sections steeper)
- Surface: Loose cinder and gravel, no pavement
- Width: Narrow, with limited passing opportunities
- Guardrails: None—sheer drops with no safety barriers
- Altitude: Thin air affects both driver alertness and engine performance
Technical Challenges:
- Engine strain: Vehicles work 40% harder in thin air
- Brake fade: Extended steep descents can overheat brake systems
- Tire grip: Loose cinder offers less traction than normal roads
- Visibility: Weather can reduce visibility to feet, not miles
- No cell service: You’re truly on your own if problems arise
Skill Requirements: I always ask visitors about their mountain driving experience. Those who’ve navigated places like:
- Colorado’s Independence Pass
- Peru’s mountain roads to Machu Picchu
- European Alpine passes
- California’s mountain fire roads
These drivers adapt quickly. But if your most challenging driving experience is highway construction zones, the Mauna Kea summit road will test you beyond your comfort zone.
Real-World Comparison: Think of it as a combination of:
- Moab’s slickrock trails (traction challenges)
- Pike’s Peak (altitude and steepness)
- Glacier National Park’s Going-to-the-Sun Road (exposure and weather)
When NOT to Attempt:
- First-time 4WD drivers: This isn’t the place to learn
- Poor weather conditions: Fog, rain, or high winds
- Mechanical issues: Any car problems should be resolved first
- Time pressure: Rushing leads to dangerous decisions
- After alcohol: Even small amounts are magnified at altitude
Success Strategy: Start your descent no later than one hour before sunset. I’ve assisted too many visitors who underestimated descent time and found themselves navigating technical terrain in darkness. What takes 30 minutes in daylight can take 90 minutes—or become impossible—after dark.
The Mauna Kea summit road isn’t just a drive—it’s an adventure that demands respect, preparation, and humility. Approach it with the same mindset you’d bring to technical hiking or rock climbing, because the consequences of poor decisions are equally serious.
Can You Go to the Mauna Kea Summit on Your Own?
The short answer: Yes, but with important restrictions and responsibilities.
I’ll never forget Sarah and Mike, a couple from Colorado who approached me at the Mauna Kea Visitor Center last summer. They’d driven rental cars up mountains across the Rockies and figured Mauna Kea would be just another scenic drive. “We’ve got this,” Sarah said confidently, pointing to their compact rental car.
Here’s what I told them—and what every independent adventurer needs to know:
Daytime Access Only: The Mauna Kea summit road is open to the public during daylight hours, typically from 30 minutes before sunrise to 30 minutes after sunset. This isn’t just a suggestion—it’s a safety requirement that could save your life on the steep, unpaved summit road.
No Commercial Use Without Permits: If you’re planning to take paying clients or conduct business on Mauna Kea, you’ll need proper permits from the Office of Mauna Kea Management. Independent personal visits are welcome, but respect the regulations.
Cultural and Environmental Respect: Mauna Kea isn’t just a mountain—it’s Piko Kaulana, the sacred realm where earth meets sky in Hawaiian tradition. Stay on designated paths, pack out all trash, and remember that some areas may be kapu (sacred/forbidden).
Sarah and Mike ended up following my advice, renting a proper 4WD vehicle and timing their visit perfectly. They reached the summit by 3 PM, spent an hour soaking in the views, and were safely down before the notorious Big Island winds picked up at sunset. Their photos from that day still make me smile—pure joy mixed with well-earned accomplishment.
Is It Safe to Go Up Mauna Kea?
The short answer: Generally yes, if you’re properly prepared and respect the mountain’s challenges.
Let me share a story that perfectly illustrates why preparation matters. Last winter, I met James, a marathon runner from sea level, who believed his cardiovascular fitness would carry him through anything. He’d driven straight from Kona airport to the Mauna Kea summit without stopping, eager to catch the sunset.
Thirty minutes into his summit exploration, James was sitting on a rock, dizzy and nauseous, wondering why his “runner’s high” had turned into a pounding headache. He was experiencing classic altitude sickness—something even Olympic athletes can’t outrun without proper acclimatization.
Key Safety Considerations:
Altitude Sickness Prevention: The Mauna Kea Visitor Information Station at 9,200 feet exists for a crucial reason—acclimatization. Spend at least 30-45 minutes here before continuing to the summit. Drink water (not coffee or alcohol), eat light snacks, and listen to your body.
Temperature Extremes: While you’re basking in 80°F sunshine at sea level, the Mauna Kea summit can be below freezing with wind chills that’ll cut through tropical clothing like butter. I’ve seen visitors in flip-flops and tank tops shivering uncontrollably at the top.
Road Conditions: The summit road is steep, unpaved, and unforgiving. There are no guardrails between you and some spectacular—but deadly—drops. Weather can change from clear skies to white-out conditions in minutes.
Thin Air Effects: At 13,803 feet, there’s about 40% less oxygen than at sea level. Simple tasks become exhausting, and decision-making can become impaired. Even experienced hikers report feeling like they’re moving through molasses.
James learned his lesson the hard way but became one of my success stories. He returned three days later, properly prepared with warm layers, having spent time acclimatizing at the Visitor Center. His summit experience went from miserable to magical—all because he respected what Mauna Kea demands from its visitors.
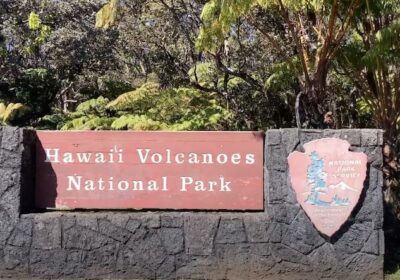
Is the Mauna Kea Summit Free?
The short answer: Yes, there’s no entrance fee to access Mauna Kea Mountain.
This surprises many visitors, especially those coming from national parks where fees are standard. Mauna Kea remains freely accessible to the public, reflecting Hawaii’s spirit of sharing natural wonders.
What’s Actually Free:
- Access to the Mauna Kea summit road
- Parking at the Visitor Information Station
- Self-guided exploration of the summit area
- Use of public facilities at the Visitor Center
Important Caveats:
- Weather Closures: The summit road closes frequently due to ice, snow, or high winds. Always check the Mauna Kea Weather Center before heading up—disappointment at the gate after a 2-hour drive is heartbreaking.
- First-Come, First-Served: Summit parking fills up, especially during peak sunset/sunrise times and astronomical events. Arrive early or have backup plans.
- Vehicle Requirements: While access is free, you’ll need a proper 4WD vehicle for the summit road, which means rental costs if you don’t have one.
I remember guiding a family from Japan who’d budgeted heavily for park fees, expecting Mauna Kea to cost as much as Mount Fuji access. When I told them it was free, their 8-year-old daughter asked, “But how do they keep it so beautiful if it’s free?” That’s the magic of Mauna Kea—it’s maintained through respect, not revenue.
Can You Go to Mauna Kea Without a Guide?
The short answer: Yes, independent travel is allowed, but guides offer experiences you can’t replicate alone.
Picture this scenario: It’s a crystal-clear night on Mauna Kea, and you’ve successfully navigated to the summit independently. You’re proud of your achievement, and the views are spectacular. But then you notice other groups nearby with telescopes, pointing excitedly at celestial objects, sharing knowledge about constellations and astronomical phenomena that you’re missing entirely.
This happened to Tom and Linda, experienced travelers from Australia who pride themselves on independent exploration. They’d summited Mauna Kea solo and felt accomplished until they realized they were witnessing a rare meteor shower—but didn’t know where to look or what they were seeing.
Advantages of Going Solo:
- Complete flexibility with timing and pace
- Lower cost (just vehicle and fuel)
- Personal sense of achievement
- Ability to spend as much or as little time as desired
What You Might Miss Without a Guide:
- Astronomical Knowledge: Mauna Kea hosts some of the world’s most advanced telescopes. Guides provide context about the observatories and help identify celestial objects.
- Cultural Insights: The mountain’s sacred significance in Hawaiian culture has layers of meaning that aren’t obvious to casual visitors.
- Safety Expertise: Professional guides know weather patterns, road conditions, and altitude management techniques.
- Equipment Access: Many tours provide telescopes, warm clothing, and specialized gear.
Best Compromise: Consider starting independent but joining evening stargazing tours at the Visitor Center. You get the satisfaction of reaching the summit yourself while gaining expert knowledge for the astronomical experience.
Tom and Linda returned the following night with a reputable astronomy tour. “We thought we’d seen everything the first night,” Linda told me later. “But having someone explain what we were looking at transformed the entire experience from good to absolutely magical.”
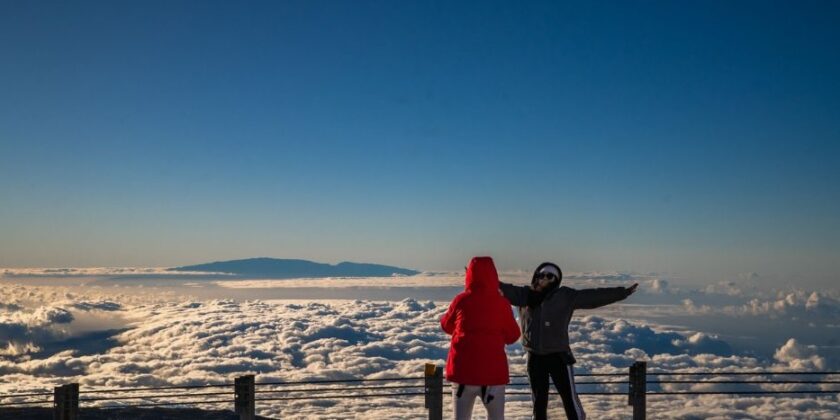
The Journey Above the Clouds
Standing atop Mauna Kea Mountain changes you in ways that extend far beyond the spectacular views and thin air. Whether you’ve hiked the challenging Humuʻula Trail, navigated the technical summit road in a 4WD vehicle, or joined a guided astronomy tour, you’ve accomplished something remarkable—you’ve touched the edge of heaven.
Key Takeaways for Your Mauna Kea Adventure:
Preparation is Everything: From altitude acclimatization to proper cold-weather gear, success on Mauna Kea demands respect for the mountain’s unique challenges. The visitors who have transformative experiences are those who prepare thoroughly and approach the mountain with humility.
Multiple Paths to the Summit: Whether you’re a solo adventurer seeking independence, a family needing guided expertise, or a budget traveler maximizing the Visitor Center experience, Mauna Kea offers pathways for every type of explorer.
Sacred Space Stewardship: This isn’t just a scenic destination—it’s Mauna a Wākea, where earth meets sky in Hawaiian tradition. Your journey becomes part of a story that stretches back centuries, connecting you to the spiritual and scientific heritage of this extraordinary place.
Beyond the Destination: The real magic of Mauna Kea often happens in the preparation, the journey, and the reflection afterward. The mountain teaches patience, demands respect, and rewards those who approach it with the right spirit.
Your Next Steps:
- Check current conditions at the official Mauna Kea Weather Center
- Plan your vehicle strategy based on your summit ambitions
- Research cultural protocols to ensure respectful visitation
- Build flexibility into your schedule for weather variations
- Prepare for transformation—this experience changes perspectives
The Invitation: Mauna Kea stands ready to share its wonders with those willing to meet its demands. Whether you drive, hike, or tour to the top—whether you spend an hour or a full day exploring—you’re embarking on more than travel. You’re beginning a spiritual and physical journey that connects you to ancient Hawaiian wisdom, cutting-edge science, and your own capacity for wonder.
The clouds below, the stars above, and the sacred silence of nearly 14,000 feet await. Mauna Kea Mountain isn’t just the roof of the Pacific—it’s a doorway to experiences that will echo in your memory long after you’ve returned to sea level.
Your adventure above the clouds begins with a single decision: to respect the mountain, prepare thoroughly, and open yourself to the magic that awaits at the summit of Mauna Kea.
Ready to plan your Mauna Kea adventure? Start by checking current weather conditions and road status, then choose the approach that matches your experience level and sense of adventure. The mountain is calling—will you answer?